Global Fishing Tackle
Keep In Touch
  • Home
  • About Us
  • Products
    • Fishing Rods >
      • Fly Fishing Rods
      • Spinning Fishing Rods
      • Casting Fishing Rods
      • Flipping Fishing Rods
      • Jigging Fishing Rods
      • Carp Fishing Rods
      • Boat Fishing Rods
      • Surf Fishing Rods
      • Feeder Fishing Rods
      • Match Fishing Rods
      • Ice Fishing Rods
      • Catfish Fishing Rods
      • Other Fishing Rods
    • Customer Brand Rods >
      • Lure Leader
    • Fishing Rod Accessories
    • Fishing Reels
    • Fishing Lures >
      • Lure catalog
    • Fishing Bags
    • Fishing Rod Grips
    • Fishing Line
    • Fishing Caps & Hats
    • Fishing Apparel
    • FAQs
  • Become a Partner
  • Jobs
  • Blog
  • Contact Us

Fishing Rod Action, Power and Length Charts & Recommendations

4/8/2025

0 Comments

 
The two most important attributes to consider when selecting a fishing rod are “action” and “power”. Anglers will sometimes use these terms interchangeably, but they’re actually quite different. A rod’s action indicates the point where a rod bends under pressure. Power refers to how much the rod bends, or far it bends, when under pressure. Together, action and power determine how a rod will perform.
The best fishing rods combine the optimal level of action and power for a specific fishing application. For example, a medium-fast to fast action rod with medium-light to medium power is ideal for targeting perch. But if you’re going after pike, or other large predatory fish, you’ll want a fast action rod with heavy to extra-heavy power. While there isn’t a one size fits all rod for all fishing applications, a moderate-fast or fast action rod with medium power is going to be the most versatile rod option.
Rod Action“Action” is where a rod bends under a load. Action is generally labeled as extra-fast, fast, moderate-fast, moderate, or slow. The faster a rod’s action, the closer to the tip the rod will bend. The slower the action, the farther down the from the tip the rod will bend.
Picture
Fast action rods typically bend about a quarter to a third of the way down the rod from the tip. Moderate action bend in the top half. Slow action rods bend in the lower third of the rod—and in some models all the way to the handle.
Extra FastExtra-fast action rods are relatively stiff but flex enough at the tip to provide sensitivity and response to strikes. They bend the least of all rods.
They are ideal of powerful hooksets and fighting larger fish. They are often used for fishing jigs, plastic worms and Texas rigs when targeting largemouth and smallmouth bass. Heavy action rods are also useful for punching heavy vegetation and pulling lures through the grass.
FastFast action rods have a pronounced bend about a quarter of the way down from the tip. They are excellent for fishing jigs, topwater lures, twitchbaits, and finesse presentations. (e.g. Neko, drop shot, etc.) They excel at single hook applications where maximum control over line and bait is essential.
They tend to be a bit more versatile than extra-fast action rods. They deliver accuracy and are responsive when fishing light baits. They are often used for panfish (perch, crappie, etc) and bass fishing.
They work well for single hooks and finesse presentations, and are good for a getting strong hookset. Fast action rods can be used for most fishing applications, but excel where quick hooksets are necessary and pressure is required to get a fish of cover quickly.
Fast action rods are ideal for targeting hard-mouthed fish, such as bowfin or snakehead, where getting a solid hookset can be challenging.
Moderate FastModerate-fast rods, sometimes referred to as regular-fast rods, offer more bend and cushioning than fast action rods. They generate a solid hookset without ripping the hook out of the fish’s mouth. There are a good option for casting baits and lures.
They are also popular for trolling and fighting powerful fish, and ideal for straight retrieves using spinnerbaits, crankbaits, swimbaits, and chatterbaits.
They have a moderately fast tip and are sensitive to bites, while providing a somewhat softer hookset than a fast action rod. A moderate rod performed best with medium and medium-light powers.
ModerateModerate action rods provide good casting ability for medium-size to small baits and lures. These rods have a good hookset rating and can be used for fishing smaller species including river trout and panfish.
They are great rods for fishing treble hook lures such as crankbaits, plugs and spoons because the softer and consistent pressure on the hook ensures it will stay in the fish’s mouth.
SlowSlow action rods have a low degree of sensitivity and responsiveness. These rods bend the most. They can be used for targeting smaller panfish with ultralight power. Hookset capacity for slow action rods is lower compared to moderate and fast action rods.
These soft rods are not as popular today as they once were. However, slow action, ultra-light rods are still used in some fly fishing applications and for catching panfish. Slow action rods use light lures with light line.
Rod Power“Power” describes how resistent a rod is to a given load. For example, a rod that bends only a little under a 10lb load has more power than a rod that bends quite a bit under the same load. When you hear an angler say “This rod has a ton of backbone”, what they’re really saying is the rod has a lot of power.
There are seven designations for rod power, denoted as Ultralight (UL), with power 0, all the way to Extra Extra Extra Heavy (XXXH), with a power of 7. An XXXL rod with a lot of backbone is designed to catch larger fish and cast heavy lures, where an ultralight (UL) or light (L) power rod is used for targeting smaller fisher using lighter lures.
Picture
If you’re just getting started, select your rod power based on the general size of the fish you’ll be targeting. For small fish (e.g. panfish, trout, etc.) go with lower power. For predatory fish (pike, muskies, stripers, etc.) select a rod with a heavier power rating. If you’re planning on doing some serious saltwater casting from the shore, you’ll want a surf fishing rod with extra-heavy power, or greater.
A rod’s power rating will correspond to it’s line and lure rating. A rod with a heavy power rating will typically have a higher line and lure weight rating than a rod with a light power rating, which will havea lower lower line and lure weight rating.
Picture
A medium-light to medium power fast action rod will typically support a line rating of 6-12 lbs and lure rating of 1/4-1 oz. If you are spooled with a line and lure rating within this range, then your rod will partially load up to your action rating as you retrieve your lure through the water. For example, if you’re using a rod with a “fast” action rating, then your rod should bend about 10-15% as you retrieve. This leaves you with about 10-15% more bend to allow you to sense any bites and set the hook.
When you use a line and lure combination that is heavier than the recommended load for your rod action (e.g. 20lb line and 2 oz. lure) then your rod will oveload, you’ll lose the ability to effectively mnitor the bite and set the hook, and in a worst case scenario you may even break your rode.
Rod LengthThe third thing to consider when selecting a fishing rod is length.
Selecting a good rod length is part science, part art, and part personal preference. Some anglers will swear by specific rod lengths for specific fish species, and there are certainly benefits to using specific rod lengths for specific fishing techniques and conditions, but at the end of the day it really comes down to what you prefer—and a applying a little common sense.
Fishing with a longer rod is beneficial—almost necessary—for distance casting from the shore when you need to get your presentation out beyond the surf. A typical surf casting rod is going to be in the 10′-12′ range. One of the most popular rod lengths for bass fishing is 6’6″ to 7′. And shorter rods under 6’6″ are perfect trout, panfish and beginners.
The following is general list of rod length, action, and power rating recommendations based target gamefish species and bait setup. This is just a starting point, but if you plan on using stardard lures and baits for each species, a rod with these ratings should perform well for you.
Picture
When selecting rod length you also need to consider a few other factors. If you’re a bit on the short side, trying to cast and retrieve with a long rod can get a bit unwieldy. If you know you’re going to be doing a lot of fishing in the thicket where space is limited, a shorter rod is going to be a lot easier to cast without snagging on branches. Find a reasonable rod length for the type of fishing you plan on doing, then adjust the length up or down accordingly.
0 Comments

How to Cast a Fly Fishing Rod

10/29/2024

0 Comments

 
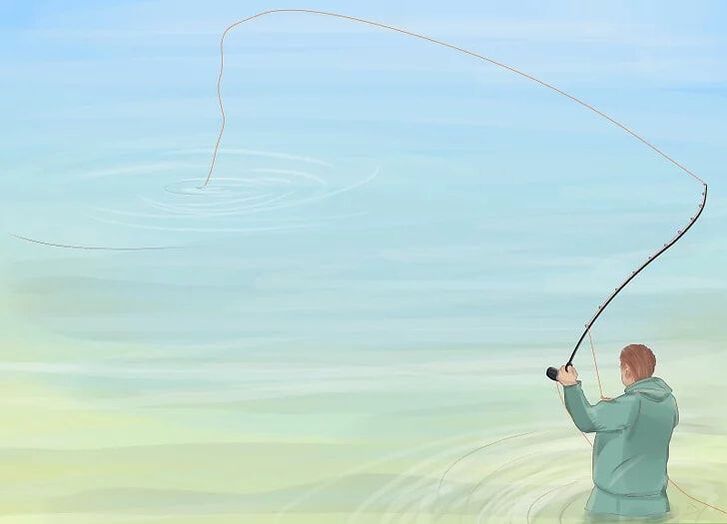
Fly fishing can be as challenging as it is fun. Learning how to cast with a fly rod takes lots of practice to master, but the basic technique is actually pretty easy to understand. Start by adjusting your line so it's rigged up properly to allow for a good cast. Then, try your hand at using the overhead cast. Once you master the basics, you can try using a roll cast to approach fish quietly and in harder to reach places!

Method 1. Putting the Fly Fishing Rod Together

1. Put together the segments of the fly fishing rod. Take the rod out of its case. Start with the 2 bottom pieces of the rod, which will be the largest ones. Slide the 2 pieces together and gently twist them to line up the 2 dots on the side. Then, slide the remaining pieces into the rod and line up the 2 dots of each section.
  • Don't force or twist the rod segments too hard or you could crack them.
  • The segments will get thinner down the length of the rod.
2. Slide the reel into the reel seat at the bottom of the rod. The small divot at the bottom of the rod is called the reel seat and is meant to hold the reel in place. Attach the reel to the rod by sliding the foot of the reel into the small opening at the top of the reel seat. Then twist the nut at the bottom of the reel seat to tighten it over the reel.
  • Wiggle the reel around to make sure it's securely attached.
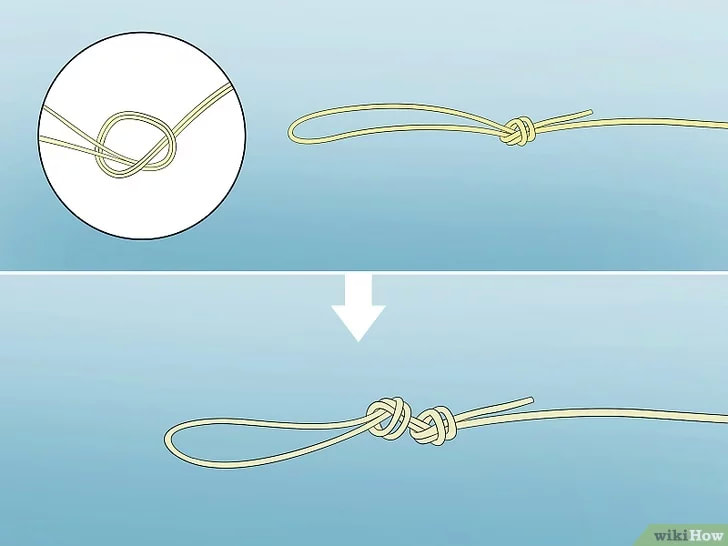
3. Make a loop knot at the end of the fly line. You'll use the end of the fly line to connect the leader (the thin line that connects the thick fly line to the tippet and fly lure) and tippet (an even thinner line that is nearly invisible to the fish and holds the fly lure) so you can string your lure. Give yourself plenty of slack in the fly line and form a loop knot at the end of it so you can easily attach the leader and change it out later if you want to.
  • Make sure the fly line is spooled tightly on the reel so it's less likely to form knots.

4. Connect the leader to the end of the fly line with a fishing knot.The leader is a length of line that is used to transition from the thick fly line on the rod to the thin tippet that holds the lure. The leader starts thick at the end connected to the line and tapers down to a smaller line where it connects to the tippet. Tie a fishing knot to connect the leader to the fly line at the thicker end.
  • The leader also keeps the line from slapping the water and spooking the fish.
  • The leader should be at least 9 feet (2.7 m) long to allow for adequate separation between the heavy fly line and the fly lure.
  • Some leaders have metal clasps that you can use to attach to the loop in the fly line.
5. Fix a tippet to the end of the leader by tying it securely with a knot. A tippet is a very thin line that attaches to the fly at one end and the leader at another. It's supposed to be nearly invisible in the water so the fish don't see the line connected to the fly. Connect a tippet to the end of the leader so it's secure and you can add a fly to the end of the tippet.
  • Use a nail knot to secure the connect the tippet and the leader.
  • The tippet should be a minimum of 4 feet (1.2 m) long.
6. Attach a fly lure to the end of the tippet with a sturdy knot. The fly has a small hook on it that will snag the fish that takes the bait. Pass the tippet through the eye opening of the hook and use a fishing knot to connect the lightweight fly to the end of the tippet. Moisten the line to make it more pliable so you can tie a tighter knot.

​
Tip: Give a good tug on the tippet and the leader to straighten them out and make sure they're secure
7. Set the fly line about 1–2 feet (0.30–0.61 m) longer than the fishing rod. The weight of the fly line is what allows you to cast, so you need to have enough of the heavier line pulled out before you try to cast. An easy way to ensure you have enough fly line is to let out enough to reach the reel at the bottom of the rod with about 1–2 feet (0.30–0.61 m) of extra length.

Method 2. Casting Overhead

1. Use an overhead cast to get used to casting a fly fishing rod. The overhead cast is the standard fly fishing cast. Mastering the overhead cast requires knowing how to properly “load” the rod, which refers to finding the tension in the line and pole to cast the fly lure. Before you move on to more advanced casts, learn to use the overhead cast.
  • The overhead cast is harder to perform when there are lots of low hanging branches because the line can get tangled easily.
2. Stand with your feet shoulder-width apart. For short to medium ranged casts, adopt a parallel stance so you're stable and in a better position to “feel” the weight of the fly line on the rod. Keep your feet evenly spaced apart and your weight centered rather than on the balls of your feet or your heels.
  • For longer casts, you may feel more comfortable standing with 1 foot forward so you can reach further behind you for a stronger cast without losing your balance.
​3. Hold the rod with your thumb on top of the grip. Don't squeeze too tightly or you won't be able to perform the quick stop at the end of the stroke. Keep a loose, comfortable grip and hold the rod in line with your intended target area.
  • Allow the rod to rest in your fingers and only squeeze the grip when you force it to stop at the end of each stroke.
  • Keep the butt of the fly rod in line with your forearm.
  • Make sure the reel of the rod is pointed down toward the ground.
4. Lay the line straight on the ground in front of you. In order to generate enough momentum in your backswing, start by stretching out about 10 feet (3.0 m) of the line from the end of the rod. Aim the line completely straight and stand square to your target.
  • Make sure that the leader and tippet don't get tangled up.
5. Bring the rod up and backward in 1 motion. Keep the tip of the rod low until you're ready to cast and use a smooth and fluid motion to bring the rod up and behind you. This will cause the rod to bend and load up with tension.
  • Think about snapping a long whip. The line should move up and overhead as it travels behind you in a large arc.
6. Stop the rod abruptly once it passes a vertical position. When you straighten the rod out above your head and it passes behind you, stop its acceleration abruptly and deliberately so the line is launched behind you. Hold the rod still as the line travels backward.
  • Think about stopping the rod at about the 1 or 2 o'clock position behind you.
7. Allow the line to unroll in the air behind you. With the rod still extended above and slightly behind you, wait for the line to travel behind you and rise as it unrolls. The energy from the backward motion will cause it to move until it extends completely.
  • Make sure you pause long enough to allow the line to fully unfurl.
​Tip: If the line falls short before it completely unrolls behind you, you may not have put enough energy or power in your cast. Straighten the line back out in front of you and try again!
8. Move the rod forward to bring the line in front of you. As soon as the line is fully extended in the air behind you, use a smooth, accelerating stroke to bring the rod forward. The line will snap forward and form a loop in the air as it travels.
  • Keep your wrist straight and your elbow close to your body to generate a fluid movement.
9. Lower the tip of the rod as the line unrolls in front of you. Stop the rod once it's about parallel with the ground to allow the energy in the line to propel it forward. As the line unrolls in front of you, slowly lower the tip of the rod to roll the line out all the way to the fly at the end. The line should end right where you were aiming.
  • Don't snap the rod down sharply or the tension in the line could cause the cast to go straight down before it has reached its target.

Method 3. Performing a Roll Cast

1. Use the roll cast when you're fishing in narrow waterways. The roll cast will cause the line to smoothly unroll over the surface of the water and is less likely to disturb fish, but it's also a little more difficult to perform. It's also important that the line is in water because the water anchors it and allows you to create a loop.
  • A roll cast is great to use when you're fishing in narrow creeks or streams.
  • The roll cast is also effective if you have a strong wind at your back that is interfering with your overhead cast.
2. Draw the rod up and back to drag the end of the line across the water. Start with about 25 feet (7.6 m) of line laid out in front of you on the water and the tip of your rod pointed at the surface. Use a slow and smooth motion to bring the rod back and drag the line over the surface of the water.

Tip: Make sure you don't pull the line out of the water. The friction of the line and the water is what loads the rod and allows you to cast it forward.​
3. Stop the stroke with the rod tip high when a loop has formed behind you. As soon as your rod reaches just past a vertical position, stop and hold it in position. The line should be slack and droop behind the tip of the rod, creating a loop.
  • The larger the loop, the more power you can generate to cast the line forward.
4. Accelerate the rod forward quickly. Once you've formed the loop with the backward motion, quickly move the rod forward to start the forward cast. Keep your hand high and the rod pointed up. The line will start to roll over the surface of the water and move the direction of your cast.
  • Move forward with a smooth and consistent movement rather than a short and jerky motion.
5. End the cast by stopping abruptly to allow the line to unroll. As you move your rod forward, the loop will rise up. Stop your cast abruptly once it's nearly parallel with the water. The loop will roll out on top of the water and move to where you're aiming your cast.
  • Allow the end of the line to land gently on the surface of the water.
0 Comments

How to Set Up an Ice Fishing Tip Up

10/9/2023

0 Comments

 
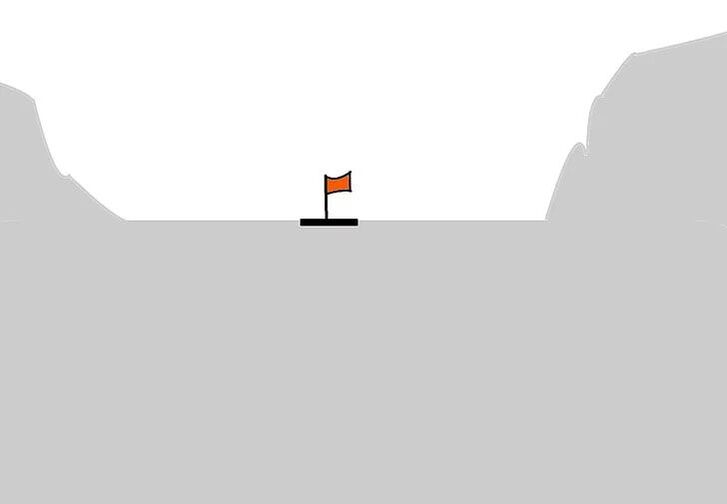
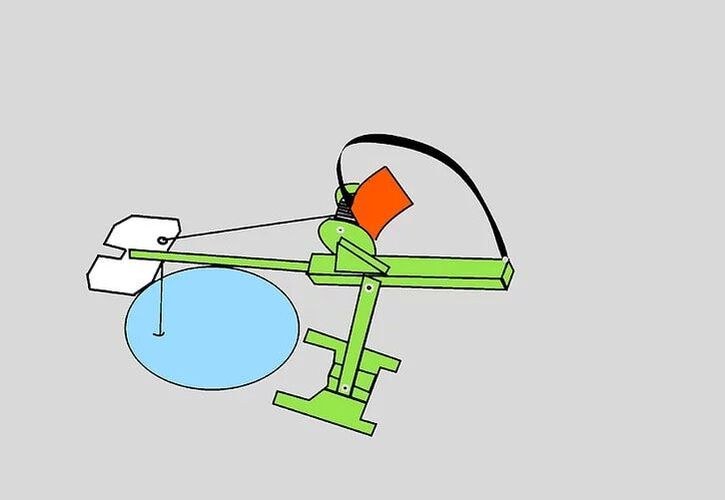
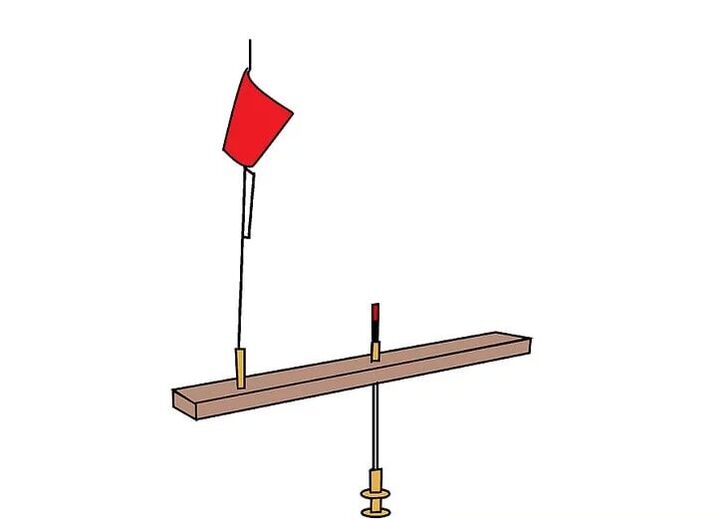
​Tip-ups are to ice fishing what trot lines are to river bank fishing for catfish, a way to present live bait to fish without holding on to a rod. Tip-ups allow ice fishermen to fish multiple holes at the same time, fish various depths at once, or work various positions on drop-offs or other bottom structures. Tip-ups are rigged with a small flag that pops up when a fish takes the bait, hence their name. Following are steps on how to choose and set up an ice fishing tip-up.

Method 1:Choosing a Tip-Up
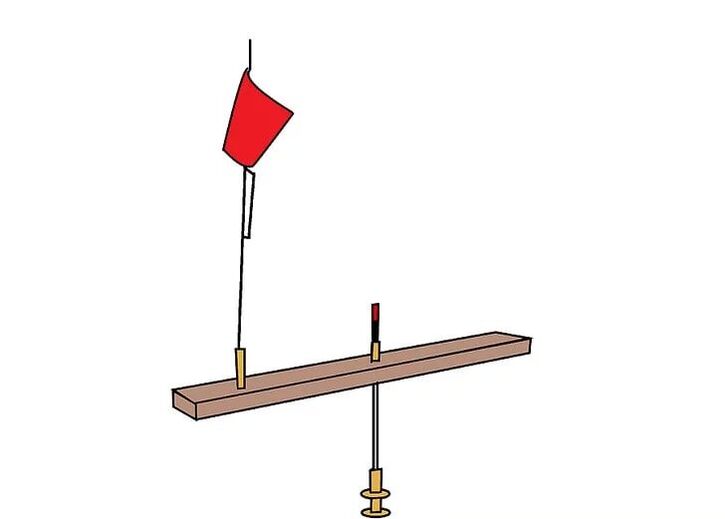
1. Choose a durable tip-up. While some tip-ups offer fancy looks and features, you want to look at the materials the tip-up is made of. Although plastics are lighter in weight, they usually do not handle exposure to sunlight and cold weather as well as either wood or metal.
  • Most tip-ups are designed so that the line spool is underwater when the tip-up is set up. The water protects the spool and line from freezing in the cold air. Some tip-ups, however, use a windlass design that keeps the line spool and most of the tip-up above the water.
2. Choose a tip-up you can see from a distance. Your tip-up should have a large enough flag on a long enough pole that you can see it from a distance of 100 yards (91.4 m) (90 m) in most weather conditions. Choose an orange flag over a yellow one, as a yellow flag will appear white as you get further away from it.
  • Having the rest of the rig be brightly colored as well can be helpful as well to keep you from accidentally stepping on it as you check all your rigs. If your tip-up isn't brightly colored but is made of wood or metal, you can paint it so you can see it better.
3. Look for helpful features. In addition to their cross pieces, line spool, and flag, some tip-ups offer special features to assist ice fishermen in recognizing when a fish is on the line and helping to keep the hole being fished open.
  • Some tip-ups supplement the flag with an "action indicator" that shows the line movement when a fish has taken the bait and is swimming away with it.
  • Some tip-ups feature a round cover that fits over the hole being fished to keep it from being exposed to the air and thus freezing over.

Method 2: Rigging a Tip-Up

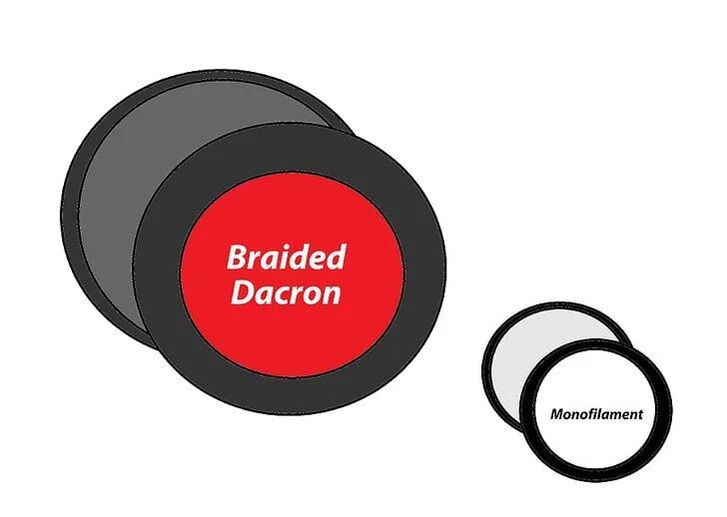
​1. Fill the line spool with a braided or Dacron line. While monofilament line is appropriate for the reel on an ice fishing rod, a braided or Dacron line of 30 to 40 pound test (15 to 20 kg class) is a better choice for a tip-up, as you can see it more easily against the snow than a (usually) clear monofilament line. You will need a short length of monofilament?- from at least 6 inches (15 cm) to as much as 3 to 4 feet (0.91 to 1.2 m) (0.9 to 1.2 m) of 8 to 10 pound test (4 to 5 kg class) -- for a leader, but only for that purpose.
  • If ice fishing for pike, substitute a braided steel leader for the monofilament
2. Attach a swivel to the end of the line. Your monofilament leader is attached to the other end of the swivel.
​3. Attach a hook to the other end of the leader. The size and type of hook depends on the type of fish you're after.
  • For bluegill, crappie, perch, or other panfish, use a size 6 or size 8 single hook.
  • For walleye, use a size 4 or size 6 single hook.
  • For pike, use a size 2/0 to 6/0 single hook or a treble hook. Some hook rigs for pike feature a pair of treble hooks.
4. Bait your hook with the right live bait for the species you're after. In most cases, you'll use minnows, shad, or suckers; however, grubs, mealworms, or waxworms can be effective for panfish. Pieces of nightcrawlers work well for bluegill, crappie, and perch, while whole nightcrawlers are good bait for catfish or largemouth bass.
5. Use enough split shot to keep your bait down, but no more. Attach your split shot to the leader, far enough from the bait to sink it, but not enough to impair its swimming ability; about 4 to 5 inches (10 to 12.5 cm) is about the right distance.
  • Using split shot with little projections at the end opposite the mouth of the split shot will let you change split shot weights as necessary without having to cut the leader to change the shot.

​Tips

  • Check the laws of your state or province regarding how many ice fishing rods and tip-ups you can use at any given time.
  • To maintain your tip-up, periodically spray the moving parts of the line spool and flag release mechanism with a water displacement or silicone-based lubricant. The screws, nuts, and bolts on any metal parts, particularly those that fold in or out, should also be sprayed with a lubricant or anti-corrosive chemical.
  • When you first start ice fishing, a good hand-powered ice auger is sufficient for drilling the holes you need. As you gain more experience, you may want to purchase a power auger. Some fishermen choose to drill multiple holes in the ice, while others drill only a single hole at a time. If you choose to drill several holes at once, you'll want a skimmer to keep the holes clear of slush while you fish.
0 Comments

How to Fly Fish

3/16/2023

0 Comments

 
Fly fishing is an outdoor sport enjoyed by many anglers around the world. Fly fishing is much more complicated than fishing with a standard spin rod, but the solitude you'll find while fly fishing (and the meditative casting ritual) is unmatched. Wading into an icy river and replicating the movements of a fish's prey on the water are a wilderness experience you won't get from casting with worms off a pier. Fly fishing can be difficult, and it takes a lot of practice to learn how to properly cast. With a little practice, though, you'll be pulling in monster trout in no time.
Picture

Part 1. Casting and Reeling In a Fish

1. Use a two-stroke cast if you've got the room. If you're on a clear bank with no low-hanging trees, you should be able to use a two-stroke cast. This is a basic casting method, but it requires some clearance above and behind you. Make sure you have enough room before attempting this cast, as a low tree branch can easily snag your line and cost you your fly.
  • Lead out approximately three rod-lengths' worth of fishing line.
  • Hold the rod with your dominant hand.
  • Check the line for tangles. If there are any tangles present, you'll need to straighten them out before casting.
  • With your arm slightly extended, whip the tip of the rod up and back in a steady movement.
  • Don't whip the rod too far back; you'll want to stop when the tip of the rod is pointing up and just slightly behind you.
  • Watch as the line unfurls. The three rod-lengths' worth of line should be extended.
  • Immediately before the line completely straightens out above/behind you, flick the rod forward to send the line out onto the surface of the water.
2. Try a roll cast if there's no room behind you. If there's not enough room above or behind you, you may want to try a roll cast. This is somewhat similar in action to the two-stroke cast, but it doesn't require as much room or as much loose line.
  • Hold the rod in your dominant hand slightly in front of you.
  • Check the line for tangles. Straighten out any tangles present before you attempt to cast.
  • Gently bring the rod back. The tip should be above your casting shoulder, and a small piece of line should be hanging behind you.
  • Move the rod forward. Start slow, then speed it up as your arm comes down.
  • Don't whip the rod too far ahead. Stop when the tip of the rod is still angled slightly upward.
  • The loop of line should unfurl and cast onto the surface of the water.
3. Make your fly attractive along the water's surface. Fish should see your fly as a real insect/invertebrate. How you manage the line will determine how convincing your fly is to a fish.
  • There are two primary ways to imitate an actual insect: letting it drift without any movement on your part, or giving the line very slight, gentle twitches to imitate natural movement.
  • Move your rod to the right or left to change the angle at which the line lays on the water.
  • If you are upstream from a fish, keep the rod (and your rod arm) angled upstream. As the fly moves downstream with the current, slowly angle your rod and arm to face downstream at the same speed the fly is moving at to create a drag-free line.
  • If a fish is feeding near the surface, try to cast your fly so that it lands near the fish's head and floats towards it.
4. Hook a fish. Once you've gotten a bite (which you should be able to feel if the line is taut), you'll need to hook the fish. If you don't hook the fish, or if you don't hook it properly, it can easily get away off your line.
  • Keep the rod's tip low to the water. That way when a fish strikes, you can move the rod's tip in the direction of line curvature.
  • Keep the line as taut as possible. If you try to set the hook while there's excess slack in the line it will not move the hook whatsoever.
  • Set the hook securely in the fish's mouth. You'll do this by continuing to hold the rod with one hand and pulling down sharply on the line with the other hand.
  • Do not yank the rod tip upwards. Some fishers do this thinking it helps set the hook, but really it just complicates the process of reeling in your fish.
  • If the fish tries to bolt upstream, keep the rod tip close to the water and pointed in the direction of the line, not the fish.
  • Continue to strip away line until the fish tires itself out.
  • Palm the reel if you're pulling in a big fish. This simply means applying pressure with your palm to the reel to prevent the spool from running out.
5. Net your fish once it's tired and in shallow water. After you've hooked your fish, it will begin to fight. It may try to swim upstream or downstream, or it may just jerk the line around trying to get free. The key is to let the fish tire itself out (while moving your rod accordingly), then reel it in.
  • Do not lift your rod up. This could put too much pressure on the rod, causing it to break.
  • Try to keep the fish in the water as much as possible, especially if you plan on releasing it.
  • If you're working with a larger fish, it may be easier to "beach" the fish by leading it onto a bank where the water is shallowest.
  • Move the net into position and gently pull the line to guide the fish head-first over the net's rim.
  • Once the fish's body is past the rim of the net, flick the rim up (to ensure the fish doesn't jump out quickly) while simultaneously lifting the net out of the water. This should prevent escape and send the fish to the bottom of your net.
  • Carefully unhook your fly from the fish's mouth. Remember that it will most likely be thrashing and flailing, so be careful not to cut yourself or hurt the fish.
6. Decide whether to keep the fish or release it. Once you've netted your fish, you'll need to decide whether your fish is big enough to keep. If it's too small, you'll need to release it. Before you do anything, though, you should know the restrictions and requirements in the region where you're fishing.
  • Different regions have differing requirements on the minimum size of a fish. Those requirements may change within a single state if you're fishing in a wilderness area.
  • Some bodies of water (especially those in wilderness areas) may be catch-and-release only. In this case, you must unhook the fish and set it loose in the water.
  • Always check the laws and guidelines in any region you intend to fish. You can find these requirements by searching online, or by asking a park ranger (or the equivalent).

Part 2. Learning the Basics of Fly Fishing

1. Find out the fishing license requirements in your region. Before you set out for any kind of fishing trip, you'll need a valid license issued by your state. Every state's requirements are different, and some wilderness areas have either more lax restrictions or even greater restrictions/prohibitions on fishing. Getting caught without a license or fishing in a body of water that doesn't allow fishing can land you in trouble with the law, so it's best to comply with your state's requirements and know the rules wherever you intend to fish.
  • Search online to see what your state requires. You can also find helpful courses on e-learning sites like Udemy.
  • You can also find information online on where and how to acquire a fishing license.
  • Some locations may allow you to acquire a fishing license online, while others require you to visit a retail or licensing facility in person.
  • If you need a fishing license quickly, search "fishing license" and the name of the state. In many places, you can use a website or an app to get your fishing license immediately—you just save the license to your phone.
2. Borrow or purchase quality fishing gear. You'll need some specialized equipment in order to fly fish. If you're working within a budget or aren't sure yet that you'll want to stick with fly fishing, it's best to borrow gear or purchase low-cost equipment. The basics you will need at any price point include:
  • a fly rod (for most freshwater streams, lakes, and ponds, a six to eight-foot rod is sufficient)
  • a spool
  • flies
  • pliers
  • a hemostat (special clamps/forceps used to remove hooks from a trout's mouth)
  • a sharp pocket knife
  • a rod and reel case
  • a fly box to transport your gear
  • a landing net
  • a hat to block out the sun (anything with a brim will suffice)
  • sunglasses with polarized lenses (so you can see through the glare in the water)
  • waders
  • wading boots (for better grip on the slippery riverbed)
  • non-slip feet attachments (like sole spikes)
  • a fly fishing vest with pockets for your tools and flies
3. Choose effective flies. There are many different types of flies, each one designed to mimic a different aquatic invertebrate. You can purchase pre-made flies at most fishing supply stores, or try making your own. Some of the most common types of flies are designed to look like the following aquatic invertebrates/insects:
  • mayfly hatch
  • Caddisfly hatch
  • stonefly hatch
  • terrestrial hatch (designed to look like and imitate a terrestrial insect)
  • midges
  • scuds
  • leeches
  • dragonfly/damselfly
4. Learn to tie your own dry fly. If you've been fly fishing for a while or simply like working with your hands, you may prefer to make your own fly. Be aware, however, that it can be very time-consuming. You'll need various types of feathers and fur, good eyesight (or a lighted magnifying glass to see better), and skilled hands.
  • Pass the line just before the eye of the hook and wrap it around the shank of the hook to the midpoint.
  • Place your fly materials on the shank of the hook and pinch them in place.
  • Wrap the line around the fly materials until they're firmly in place, then wrap back over the spot you just wrapped. This will help secure the hackles (or whatever materials you're using) in place.
  • If you add any additional materials, make sure they're approximately even/level with the materials already wrapped to your hook.
  • You can split hackles or other materials by separating them a tiny bit (just a half-inch or so at the tips) and wrapping some of the line between them.
  • Apply some wax to the line just before the hook/fly.
  • Pinch and twist a tiny amount of dubbing fur to the wax. Keep twisting and wrapping it in one direction up and down the waxed portion of line until the fur is tightly around that section of the line.
  • Wrap the waxed and fur-wrapped section of line around the hook shank towards the tail, then turn and wrap back over the shank.
  • Tie off the line, cut off any excess thread, and use a drop of liquid cement to secure the whole fly in place.
5. Tie fly knots more effectively. Whether you're tying your own homemade fly or tying on a store-bought fly, it's important to know how to attach a fly to your line so that it will stay on. Don't tighten any knots until your fly is in position, and make sure you know how to properly secure a fly on your line before you cast into a river.
  • Always wet your knot with saliva or river water before tightening it. This allows you to slide the knot around on the line and get it into place.
  • Keep your knots tight once they're in position. Use a continuous and steady pull on the line, and check that your fly is secure before casting.
  • Trim any excess line off the end past the knot. Try to cut as close to the knot as possible without actually hitting the knot itself.

Part 3. ​Finding the Right Time and Place to Fish

1. Choose a fishing location where fish are likely to gather. Fishing is partly a game of chance, but where you choose to fish can make a big difference in the outcome of your expedition. It's best to choose a quiet, secluded place far from other people (including other fishers). You'll also have to read the water to find the best places to cast, as fish tend to gravitate towards certain underwater environments.
  • Look for boulders and submerged trees/debris. Fish tend to use these underwater areas for shelter/protection, as well as for feeding.
  • Scan the water for any areas just downstream of rocks and trees. Fish commonly position themselves just past these refuge areas knowing that smaller fish and aquatic invertebrates will travel downstream.
  • In the early morning hours you might be able to find fish in unusually shallow water as they search for food. Stand on the bank and scan the shallows for signs of fish.
  • Try casting in undercut banks. If the water has worn out a channel under the bank of the river and created a hollowed-out space, it's a good bet that fish congregate there.
  • Look for pools where the stream/river widens to a gut. The head of the pool (where the pool first widens) is usually a good fishing spot, as well as the slower current just downstream of the head.
  • Avoid casting in the downstream end of a pool (called the tailout). That area tends to be more shallow and near rapids/riffles downstream, so most fish tend to avoid these areas.
2. Fish at the right time of day. Almost as important as where you fish is when you fish. Fish tend to feed in the morning around sunrise, and again in the evening around sunset. However, if you're new to fishing, it may be easiest to learn how to fish in the midday sun.
  • If you're just starting to learn how to fly fish, you may not know how to spot a fish on the bed or a river.
  • You'll be able to see a fish's shadows most clearly during midday due to the position of the sun and the reduction of glare on the water.
  • If you're just starting out, it may be best to practice spotting fish and casting during the midday sun. You can always stick around until fish become more active, or come back at a later time.
3. Be quiet and cautious as you approach/enter the stream. Fish are incredibly sensitive to their environment. Any kind of noise can disturb fish, though other factors may also tip them off to your whereabouts.
  • Fish can detect disturbances in the water. Some may even be able to detect disturbances along the shore.
  • Never stomp your feet or make a lot of noise on the banks.
  • Stay in the shade so you don't cast a shadow, or try crouching/squatting as you approach the water.
  • If you intend to wade into the water, move very, very slowly. Walking in too rapidly will create ripples and send the sound through the water column.
Tips
​
​
  • Try to find an enjoyable place to fish. Half the fun for many anglers is getting outdoors and spending time in a wilderness area. Just be sure to always take safety precautions.

​
Warnings
​
​
  • Always use caution if you wade into a body of water. Rocks are often slippery and the riverbed is usually littered with unseen debris, meaning you could easily trip or slip and fall in the water. If you plan to wade, it's best to wear a lifejacket in case you do end up falling in.
  • Find out the licensing requirements and any restrictions in place before you go fishing. Most wilderness areas are regularly patrolled by backcountry rangers who will write you a ticket if you don't have the necessary license or are fishing in restricted waters.
0 Comments

How to Ice Fish

10/3/2022

0 Comments

 
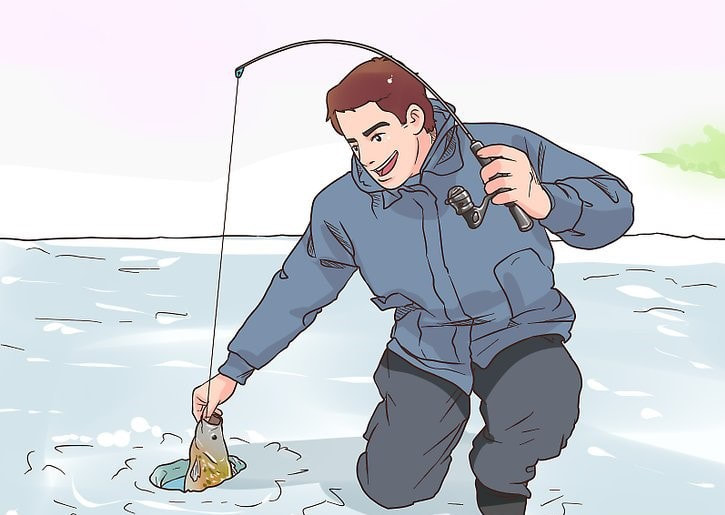
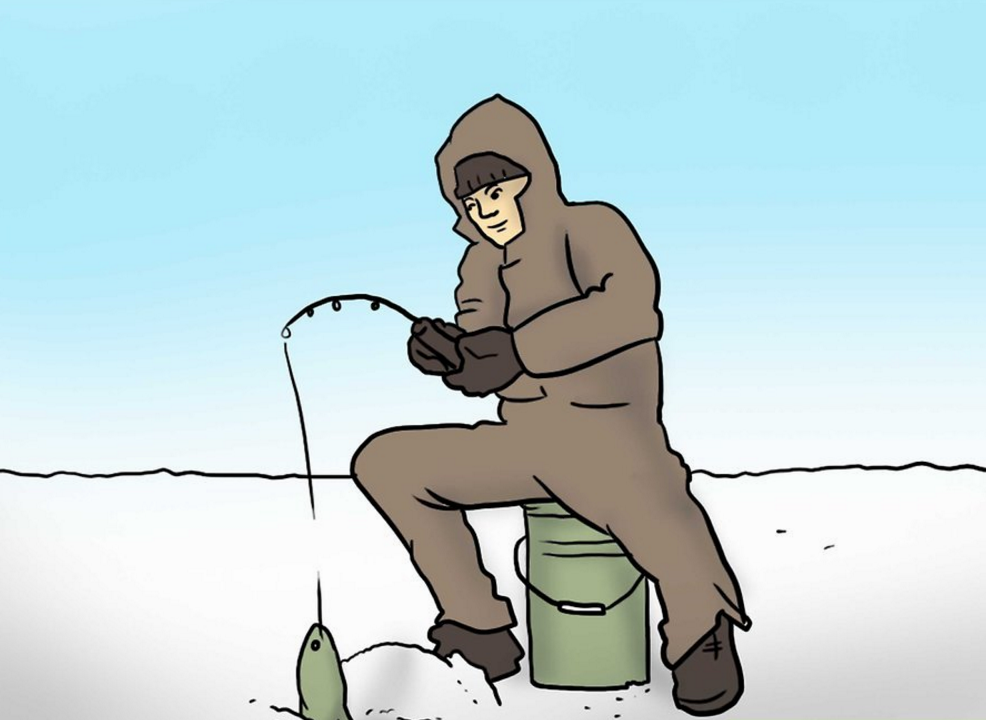
If you are a fan of fishing and do not want to give up your hobby just because the temperatures drop, you are in luck. Ice fishing is fishing through a cut hole in the ice on top of a lake or other body of water. Ice fishing is a fun activity for people of all ages, so grab your friends and head out to the ice.
Picture

Part 1.  Gearing Up to Go Fishing

1. Get a fishing license. Before you can go fishing you need to get a fishing license. Each state has its own set of requirements, but it is generally pretty easy to get one. Plus, the money for your license goes toward natural resource conservation and education.
  • Some people prefer to take a fishing course before trying out ice fishing. Some of them are even free.
  • Make sure you know your state’s regulations before any type of fishing to avoid a fine. Certain fish species are off limits, size limited, or catch-and-release only.
​2. Find someone to go with you. It is not a good idea to ice fish alone, for your safety. If you fall into the ice and there is nobody else there to pull you out or call for help, you are in a lot of danger. This is especially important if you are fishing somewhere remote. Ask a friend to go with you, or go with a group.
3. Decide where to ice fish. Most state-owned lakes allow ice fishing. You may want to check before heading out to any county-owned bodies of water, as those are often ice fishing prohibited. Lakes, ponds, or any other large body of water should have enough fish under the ice.
  • Popular species for ice fishing are Walleye, Trout, Crappie, Yellow Perch, Largemouth Bass, Pike, and Sunfish. Check around to see if anyone knows where these fish are swimming around. If you don’t know anyone, ask the local bait and tackle shop.
  • Online forums are a great resource for finding good ice fishing locations.
  • Once you have a location in mind, tell someone where you are going and when you expect to return. That way, if they do not hear from you when you expect to be back they can call for help.
4. Check the weather. As ice fishing generally takes place in the winter, weather conditions can be variable or unpredictable. This is important if you are not used to cold temperatures, or spending long periods of time on ice.
  • Make sure you know what time the sun goes down. Walking across the ice can be dangerous at night and it is easier to get caught in the dark during short winter days.
5. Educate yourself in safety. As with any outdoor activity, make sure you know proper safety procedures. Bring a first-aid kit that includes hypothermia supplies, flotation devices, and rope. More importantly, know how to use everything in your kit.
  • There are other things to consider beyond knowing how to use your first-aid kit. You should not fish alone. Be careful where you step on the ice, make sure the ice has a blue tint, is not cracked, and is very thick. The people in your party should spread out as you walk across the ice, rather than all walking together in the same spot. If you are going to be somewhere remote, you might consider investing in a GPS device.
  • If you want to verse yourself in safety beyond the basics consider taking an outdoor safety course.
6. Wear proper clothing. The most effective way to shield yourself from the elements while you are out there will be to layer. You will want to bring a backpack or duffel to carry any layers you put on or take off. With the right layering, you should be able to stay warm throughout the day.
  • Your first layer will be a thin moisture-wicking layer. Make sure your bottom layer is not made from cotton. Polypropylene, high-tech polyester, or wool materials work best. This is true for your shirt, pants, socks, and glove liners.
  • Your second layer should be a thicker layer. A wool sweater or fleece would both work fine.
  • Your top layer will be a waterproof or down jacket. It will protect you from the cold temperatures and any possible rain.
  • Make sure your boots are warm and waterproof. If you plan on doing a lot of walking to get to your fishing spot, break your boots in before your trip.
  • Bring a warm hat to wear (like a knit beanie), and gloves or mittens. You want to make sure your extremities are warm.
  • A lot of people will bring a pair of goggles to protect their eyes in case there is a snow blizzard.
  • Metal spikes that wrap onto the bottom of your shoes can make your trip along the ice a safer one. They help grip the ice better than just walking with the soles of the boots alone.
7. Bring the right gear. Wearing weather appropriate clothing is just one category of gear you need for ice fishing. Depending on conditions, you may need more gear for your safety and comfort throughout the day. You need gear to drill your hole, ensure your comfort, and catch your fish.
  • Many ice fishers bring an ice spud with them to check the ice as they walk along it. They use the rod to tap the ice in front of them, listening to make sure it is safe to take another step.
  • Ice shanties can provide a lot of comfort while you are sitting out there for many hours. They are small shelters you can set up near your ice hole that help protect you from the wind. It is also nice to have a chair to sit on so you do not have to stand all day.
  • Some ice fishers bring hand warmers just in case the temperatures dip. You can find hand warmers at most outdoor gear shops.
  • You will need an auger (or ice chisel) to drill your ice hole once you find a good spot. This tool drills through the ice into the water below.
  • An ice scoop is handy for removing excess ice from your hole once you have drilled through it. This is how you get a clean ice hole to fish in.
  • You will need a rod and reel to catch your fish. Some rods and reels are better for ice fishing. Check your local outdoor store and ask someone if they have any special sets for ice fishing. If not, any rod and reel will work.
  • Bring bait, tackle, and a tackle box. You will need this gear to lure your fish. If you are not sure how to use bait and tackle, most tackle shops will explain it to you.
8. Use the right bait and tackle. The bait and tackle you use will depend on which species you are trying to catch. Some fish species respond better to live bait, and some respond better to fake bait. Decide ahead of time which species you want to catch so you know what bait and tackle to bring with you.
  • Most fish aren’t as aggressive in the winter, so use lighter tackle for ice fishing.
  • Common tackle ice fishing are jigging rods, hooks, ice flies, jigs, and tip-ups.
  • Common live bait in ice fishing are minnows, leeches, and night crawlers.
  • If you aren’t sure what to use, ask someone at a local tackle shop.
9. Bring enough supplies. Since you will be ice fishing most of the day, bring enough food and water to keep you satiated and hydrated. It will behoove you to bring hot drinks as well, to help keep you warm. Bring extra since you burn more calories in cold temperatures.
  • Bring a bucket in case you catch something! You can bring a bucket for yourself, or one big enough to share with your fishing party. A lot of people will carry their food out in the bucket and then carry the fish back in it.

Part 2. Setting up Your Hole

1. Choose your spot. Every ice fisher has their own way of choosing where they want their spot. Many ice fishers will scout the lake in the fall to see where the fish are hanging out so they know where to go in the winter. Others will go back to their favorite fishing spots from before.
2. Make sure the ice is thick enough. The most important part of setting up your ice hole is making sure the ice is thick enough to hold your weight. Since you will be sitting there all day it is necessary that you make sure you will not fall through the ice.
  • Four inches of ice thickness will support one ice fisher and their gear. Of course, you do not want to go fishing by yourself, so you should make sure your ice is at least five or six inches thick. You can measure the ice after cutting it, or check the ice fishing reports from your wildlife district office.
3. Drill your hole. Once you have selected your ice fishing spot you will need to drill your fishing hole. Using your auger, place it perpendicular to the ice so that the tip is touching the surface. Push the auger down onto the ice and turn it clockwise until the blade begins to cut into the surface. Keep turning until the chunk of ice releases and you see the water below.
  • If you mess up your hole, just start over in another spot nearby. It is very common for an ice fisher to drill several holes in a day. You can spend a day practicing using your auger until you are comfortable using it.
4. Scrape away the excess ice. Use your ice scoop to remove any excess ice that remains. Place the scoop into your hole below the level of the ice so that it is in the water. Lift it back up, bringing with it any snow or ice that may have fallen into the hole when you drilled it. You can do this throughout the day if any ice or snow gets into the hole.
5. Cover the hole. If it is snowing hard, or you think you will leave your hole at any point in the day you can cover it with your bucket or a catch cover. This will prevent more snow or ice from getting in while you are away.

Part 3. Fishing in the Ice

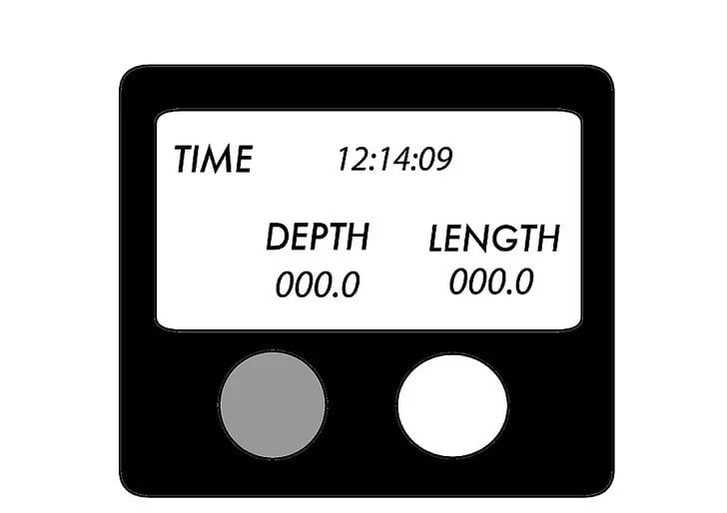
1. Determine the depth of the water. First, you need to know how deep the water is, so you know how far to sink your line. You can do this by putting a sinker at the end of a hook and dropping it into the water. Let the reel unreel until the sinker reaches the bottom. Bring it back up a few feet from the bottom and place a bobber where the surface of the water is.
​2. Place your bait on your lure. Depending on what species you want to catch, select bait from your collection and place it at the end of your lure. Once your bait is on the lure you can put the line back into the hole.
​3. Wait for your fish to bite. Now is your time to wait. If you are using a tip-up, you will place that over the hole so that it is resting on the edges. Otherwise, you can prop your rod up somewhere so that it is in a sturdy location should a fish bite your line.
  • This is a good time to play games with your fishing pals, converse, or just enjoy yourself in the great outdoors.
  • If you do not get any bites on your line after a few hours, drill another hole. You can drill another hole in the location you are in, but you will fare better to move to another location at least few hundred feet over and drill a hole there.
  • If that does not work, try using live bait if you are not already.

4. Reel your fish in. When the fish bites, reel your line in or lift your line out of the hole, lifting the fish along with it. Unhook the fish from the line. You can drop the fish into your bucket to clean later. Keep fishing!
0 Comments

How to Put a Weight on a Fishing Line

5/8/2022

0 Comments

 
Want to catch more fish swimming below the surface? Adding weights or sinkers to your rig can help your bait sink to deeper water where fish are more likely to strike. Even though there are a few different kinds of weights to use, they're all easy to add to your line on your own. Keep reading for walk-throughs on when you should use each type of weight and how to rig them!

Method1: Split Shot Weights

1. Use a split shot weight for fishing less than 6 ft (1.8 m) deep. Split shot weights look like small metal balls that have a large slit on one side. Since split shot weights are lighter, they won’t pull your bait as deep as other sinkers, but they’re great for catching any type of fish in ponds, lakes, and rivers.
  • Split shots are also easy to take on and off if you need to quickly change the weight on your line.
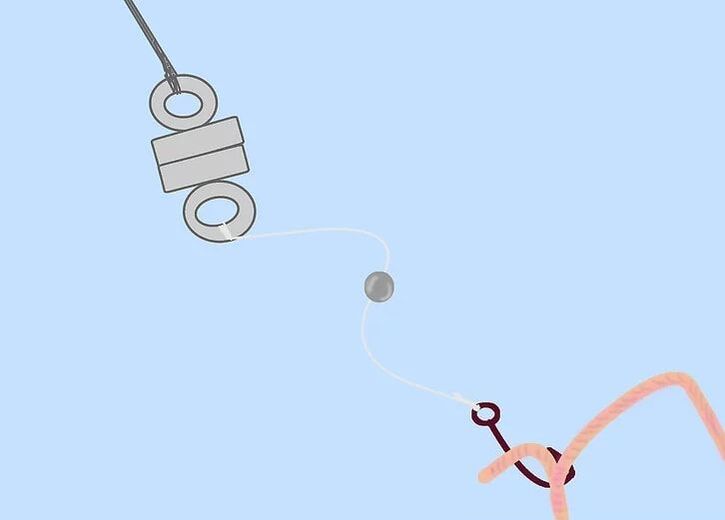
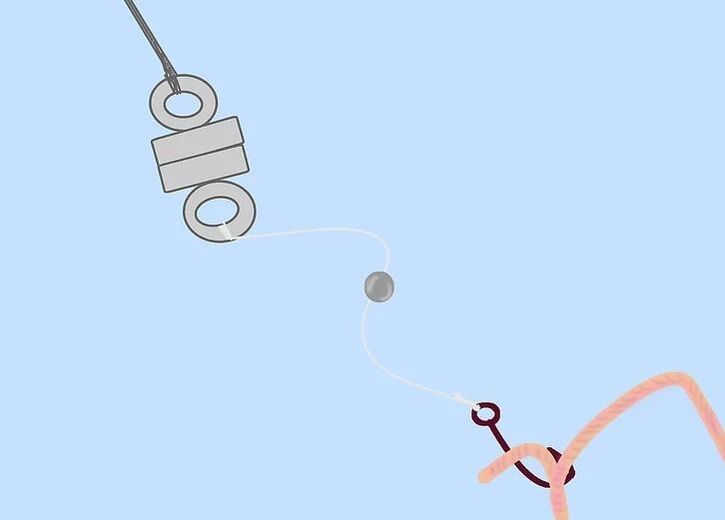
2. Position 1 or 2 weights 1–2 ft (30–61 cm) from the hook. Since you want your hook and bait to float above the weight, there needs to be a little bit of space between them. Measure up from the top of your hook and set the line inside of the large groove on the weight.
  • For shallow water, a combined weight of 1⁄8 ounce (3.5 g) will do the trick.
3. Pinch the weights onto the line with needlenose pliers. Hold the weight in place with one hand and use your pliers with the other. Gently squeeze the sides of the weight until it closes around the line.
  • If you don’t have needlenose pliers, try pinching the weight closed with your fingers.
  • Be careful not to squeeze the sides completely closed since that could damage the line. Try squeezing them until they’re barely touching, then test if the line is secure.
4. Tug on the line to make sure the sinker doesn’t move. Hold the weight with one hand and the fishing line with the other. Lightly pull on the line and watch if it slides through the weight. If the line still moves, then pinch the weight a little tighter around it.
  • If you need to reposition the weight because it moved, just pinch the opposite side to release it from your line.
Method 2. Sliding Sinkers
1. Fish with a sliding sinker to reach the bottom of the water. Sliding sinkers come in many shapes, like eggs and bullets, and they have a hole running through the middle. They weigh your line down so your bait floats just below the bottom. When a fish strikes your bait, the sinker moves along the line so the fish doesn’t feel resistance and spit out the hook.
  • Egg sinkers work really well when you’re casting in windy conditions.
  • Bullet sinkers are a little heavier than egg sinkers, so they’re best for catching larger fish in deep water.
2. Slide the sinker onto the main line running back to your reel. Make sure your line is already threaded through your reel and rod so you’re ready to fish right away. Since sliding sinkers can move freely up and down your line, just feed the line through the hole in the middle of the weight.
  • Remember to use a line that’s meant for the type of water where you’re fishing.
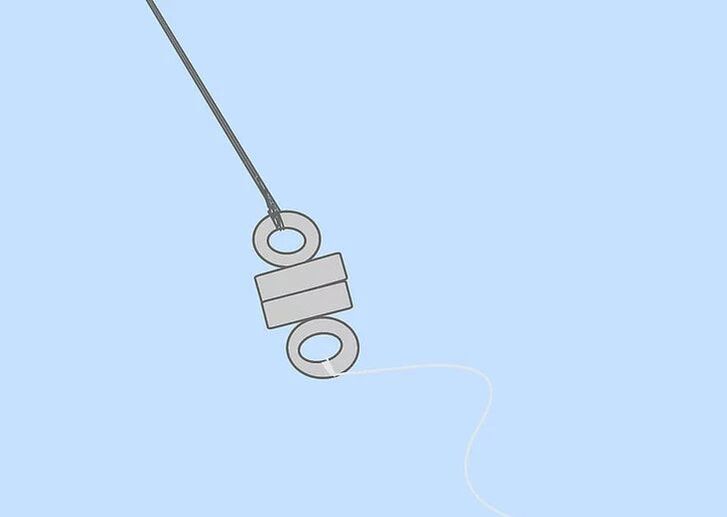
3. Tie the main line to a swivel with a uni knot. A swivel is a metal piece with eyelets that you attach to the end of your line so you can easily change your fishing rigs. To make a uni knot, feed about 6 in (15 cm) of line through an eyelet on the swivel so the line is doubled up. Then, wrap the end around the doubled-up lines 5 or 6 times before pulling it tight through the loop.
  • Make sure that the sinker can’t slide over and off of the swivel. If it can, then slide a stop bead onto the line before adding the swivel.
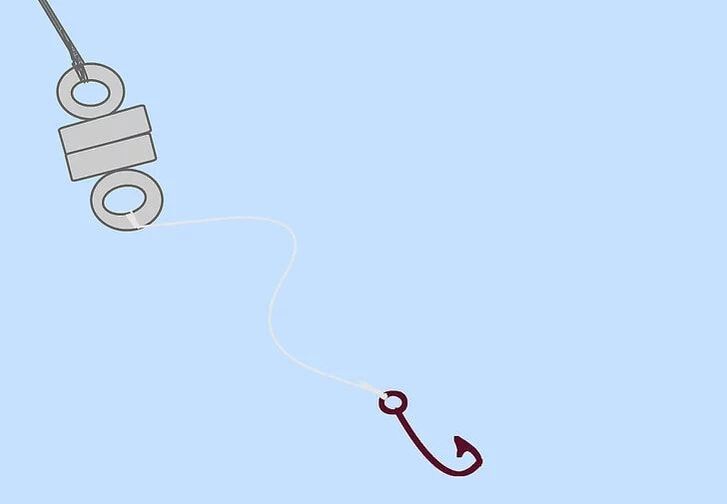
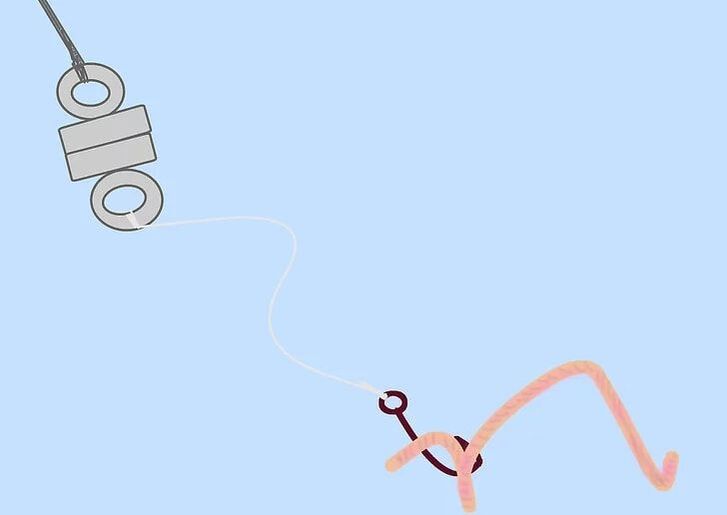
4. Attach a leader with your hook and bait to the swivel. A leader is a 12–18 in (30–46 cm) piece of line that you can easily add to the end of your main line. Use a uni knot to tie one end of the leader to the other eyelet on the swivel. Then, tie a clinch knot to attach the hook for your bait.
  • The leader will float higher than the sinker, so it’s less likely to get caught on any weeds along the bottom.

Method 3. Ring Loop (Tied) Weights

1. Stick to tied weights for fishing in deep water or strong currents. Tied ring loop weights are shaped like a pyramid or large ball with a metal ring on top. Since they’re the heaviest weights, they quickly sink to the bottom and stay put. That way, the current won’t make your line drift away.
  • You can use tied weights whether you’re fishing from the shore or a boat.
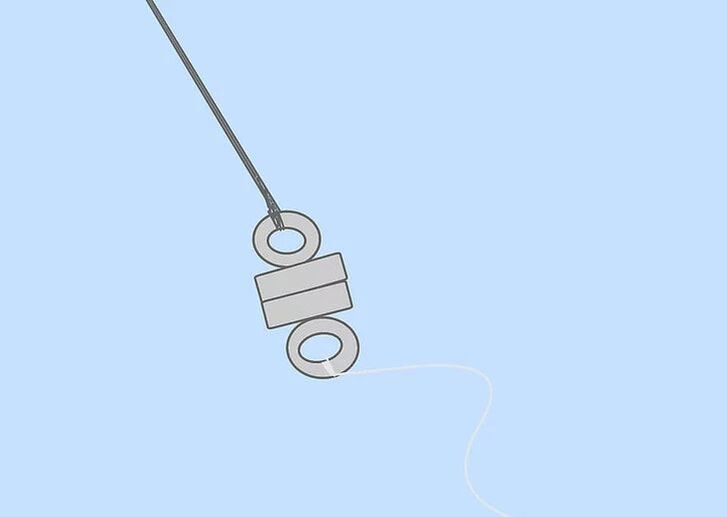
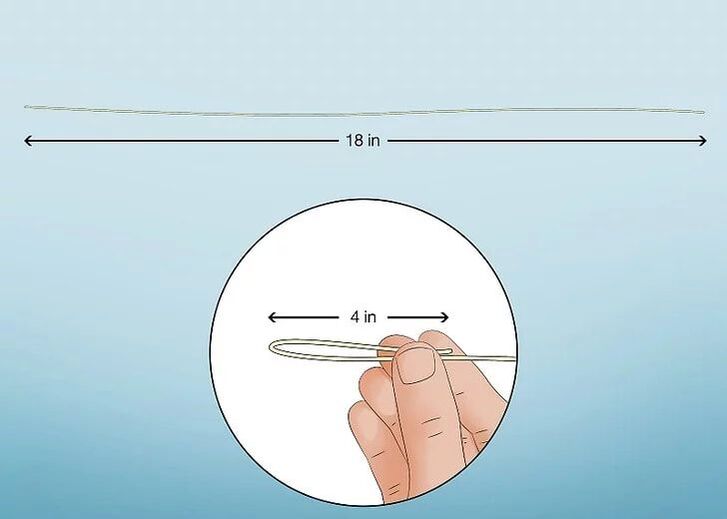
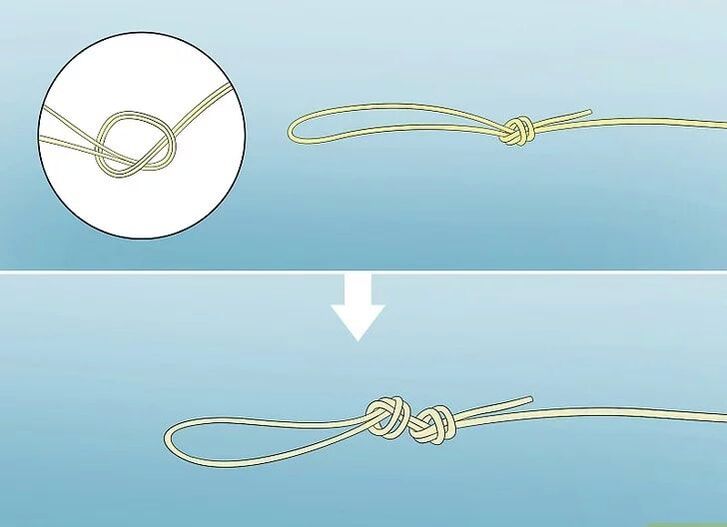
2. Form a 4 in (10 cm) loop at the end of a leader line. Attaching your sinker with a separate section of line makes it easier to remove and replace than putting it on your main line. Take a piece of line that’s about 18 inches (46 cm) long. Fold one end of the line over by 4 inches (10 cm) to make your loop.
3. Tie 2 overhand knots to secure the loop in place. Hold the end of the line that’s folded over between your fingers so it doesn’t move around. Take the looped end of the line and tie your overhand knots. Pull the line tight so it doesn’t come undone.
  • If there’s any excess line sticking out from the knot, trim it off with a pair of scissors.
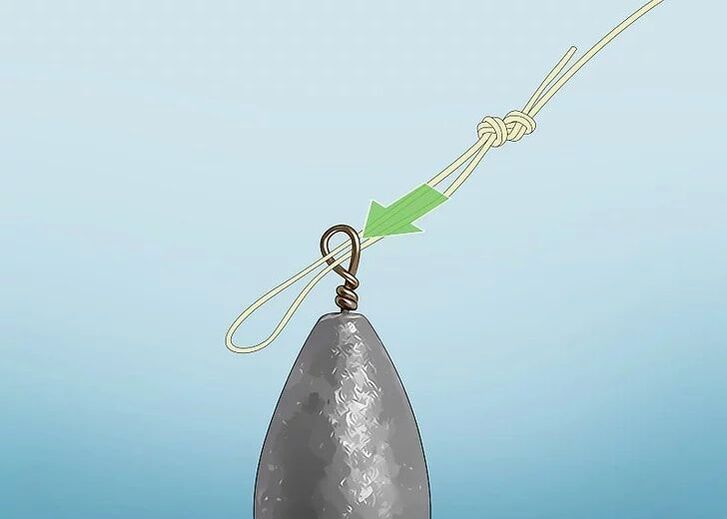
4. Feed the loop through the ring on the weight. Pinch the loop in your line and pull it straight through the ring on top of the weight. It’s okay if the knot slides through the ring right now.
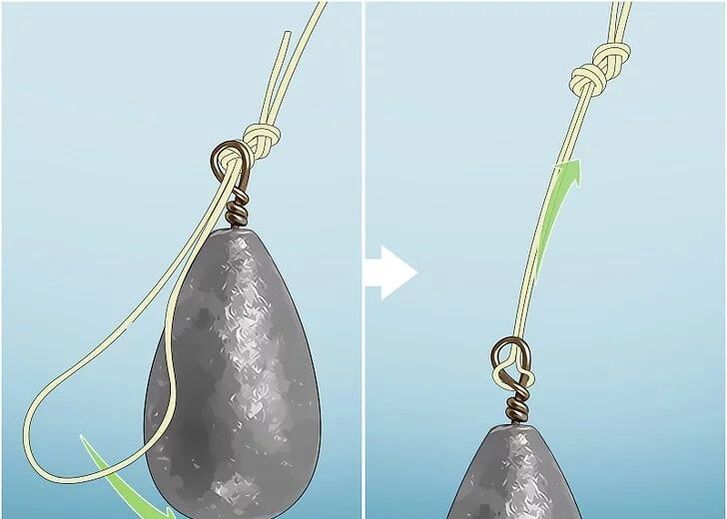
5. Pull the loop over the weight and pull it tight to the line. Guide the loop around the bottom of the weight and pull it back up towards the ring on top. The line will tightly wrap around itself at the top of the ring so nothing in the water makes your weight come free.
  • If you ever want to change the weight, just slide the loop back over the bottom and pull the line out from the ring.
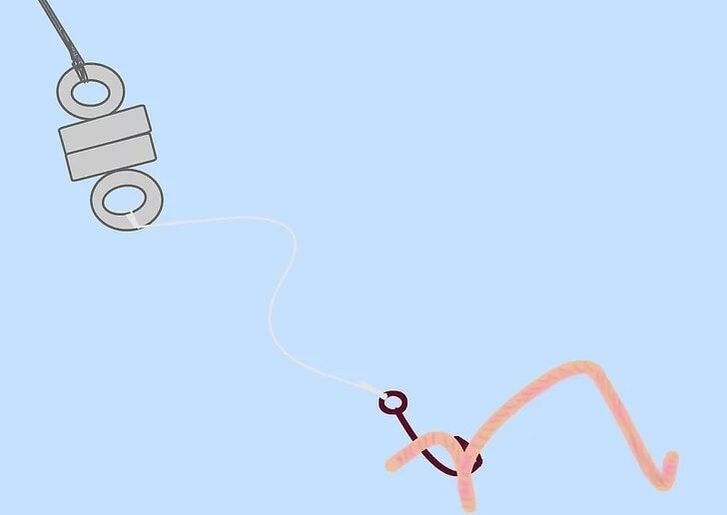
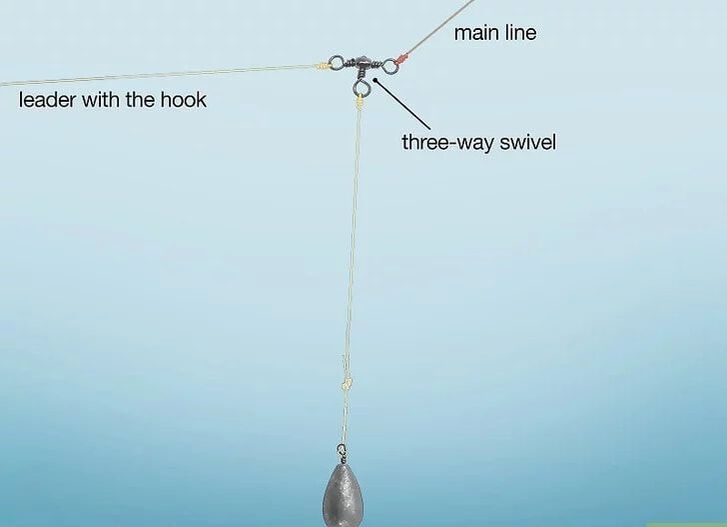
6. Attach the weighted line to a three-way swivel on your main line. A three-way swivel has 3 eyelets: one for the main line, one for the leader with the hook, and one for your leader with the weight. Tie a uni knot to connect the end of the weighted leader to one of the swivel’s eyelets.

Tips

  • Make sure you have a fishing license if it’s required in your area. You can check the fishing license requirements online.
  • Avoid using lead sinkers since they are toxic and could contaminate local wildlife that eats them.
0 Comments

How to Deep Sea Fish

8/25/2021

6 Comments

 
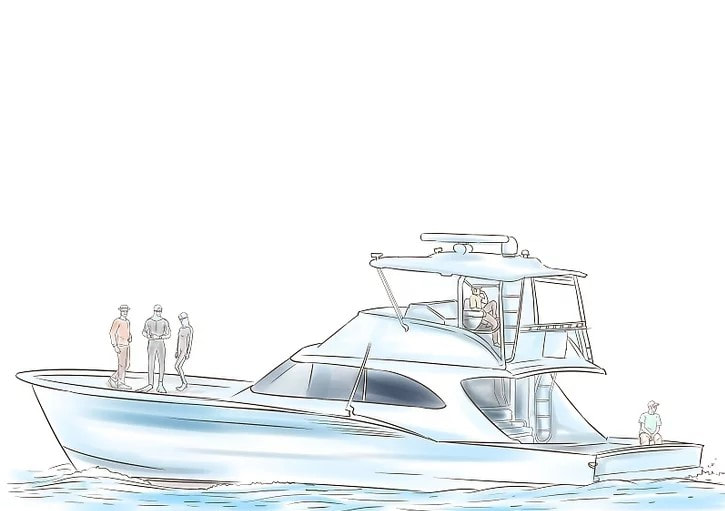
Deep-sea fishing takes place at a depth of at least 100 feet (30m), allowing fishermen to catch large game fish that cannot usually be caught in shallower waters, such as swordfish, sharks, dolphin, tuna, and marlin. Many tourist and vacation areas offer deep-sea fishing charters, which are the best possible option for beginners. To deep-sea fish, you can book a charter, or you can go out on your own. Either way, you will need to know the basics of how to prepare for the experience and stay safe.

Part 1 Getting Ready for Fishing

1. Find out what you'll need to be prepared. Most charters will be equipped with everything you need from licenses, rods and bait, to life jackets, meaning that you'll just need to show up ready to fish and with the necessary payment. When booking your tour, ask if there is anything required or recommended that you bring.
  • If you've never deep sea fished before, you need to charter a boat and go out with an experienced fishing guide. Even if you've deep sea fished many times, it's much easier to fish with a guide than to try to go it alone. Let a local show you where the fish are and have fun catching them yourself.
  • If you have a boat already, you need to make sure you provide all the necessary safety equipment and licensed necessary to fish. Deep-sea fishing rods and reels are generally larger and stronger than fresh water equipment, and can be rented at many seaside fishing outfitters, or from other fishermen. You'll also need a few spools of high-tensile line for fishing.
2. Dress appropriately. You will most likely get wet on the boat, so it's not a good idea to wear leather loafers and your most expensive pair of slacks. Wear clothes that can get wet or a bathing suit, and bring a clean towel to help dry yourself off. Sunglasses are also usually very valuable, since the light glinting off the water can be serious.
  • If you're going to be out until the sun goes down, or you're going out in cloudy weather, it's also a good idea to bring some layers. It can get chilly out at sea, depending on the season, so an old hooded sweatshirt can be an invaluable clothes item, as well as some sweatpants if necessary.
  • Leave cellphones, jewelry, or anything that you'd hate to lose or get wet back on shore. In the event that you get soaked, you don't want to have to lose anything valuable.
3. Bring sunscreen. Most boats will be at sea for several hours. Even on cloudy days the sun reflects off the ocean, making sunburns a serious possibility. Apply and reapply high-SPF waterproof sunscreen to help protect yourself from sun damage
4. Prepare for sea sickness. The ocean can make the boat very rocky. If you begin to feel sick, stay on the deck, where there is fresh air and less rocking. If you are prone to motion sickness, take medicine before boarding.
  • If you already know you're prone to motion sickness, take half a Dramamine the night before and another one an hour before or so before you get on the boat. Keep your eyes on the horizon while you're out, because it's stationary and it will help you from getting motion sickness.
5. Bring water. Be sure to drink plenty of water, because the rays of the sun reflect off the water which can make the day even hotter making you lose liquids faster. Any motion sickness effects will be emphasized when you're dehydrated, and you'll feel a lot better if you drink plenty of water.
  • It's common to drink alcohol on certain fishing trips, but make sure you supplement any alcohol you're drinking with plenty of water. In bright sun, you can get dehydrated quickly and could wake up to a serious hangover the next day if you're not careful. Not to mention that alcohol will lower your hand-eye-coordination, making you a less safe fisherman. Moderate your drinking and have plenty of water.

Part 2 Finding a Boat

1. Get a big enough party together. It's important to make fishing trips worth the while of the captain and the crew. It's expensive to run a fishing charter, which means you need to get a big enough group together to make the trip financially advantageous for the captain. They'll be more willing to work with someone who says, "There are 7 of us who'll pay to fish" than someone who's fishing solo.
  • Alternatively, if you want to go it alone, you need to be wiling to share a charter with strangers, in most cases. Even if you've got a party, it's likely that there will be other fishers on your boat. Expect to mingle.
2. Find local charter companies. Deep-sea fishing charters are available in most vacation areas where deep-sea fishing is plentiful, and in most fishing-focused towns near the ocean. If you're on vacation, ask your concierges, look for pamphlets or research online to find a deep-sea fishing charter in the area.
  • It's also possible to walk around by the piers and look for booths that will take walk-ups. While this is more common for tours and sight-seeing boat trips, it's a good way of looking around for a good charter. Talk to people and you might be able to find a better deal.
3. Book the charter. Chartered boats may fill up fast, so it's smart to book as soon as possible to ensure you have a spot. Depending on the area, you may need to book several days or several weeks ahead, so if you want to make sure that you get a spot on a boat, get in touch ahead of time.
  • When you charter your boat, it's important that you find out everything you'll need to know ahead of time. What do you need to bring? Where do you need to meet up? What time? How does payment work? Make sure that you get all the details out of the way up front.
4. Listen to instructions and ask for help. Always remember when you set foot on a boat that the captain is in charge. Just because you're paying to be out there doesn't mean that you're the boss. On a chartered boat, the crew should be knowledgeable, experienced in helping people, and expert fishermen. Ask for their help in what bait, rod and technique to use, and listen closely to all the instructions you're given.
  • The crew should also take care of all safety and legal regulations, on most good fishing charters. All of your questions about what fish you'll be catching, what size the fish need to be, and other considerations should be taken care of on a charter.
5. Research the local laws and regulations if you plan on going out yourself. Before going out to sea, contact the local wildlife commission for a listing of laws and regulations in your area. Commonly there will be regulations regarding where you can fish and when, required licenses and what kind and how much fish can be kept. Penalties may be enforced for any laws or regulations not followed.
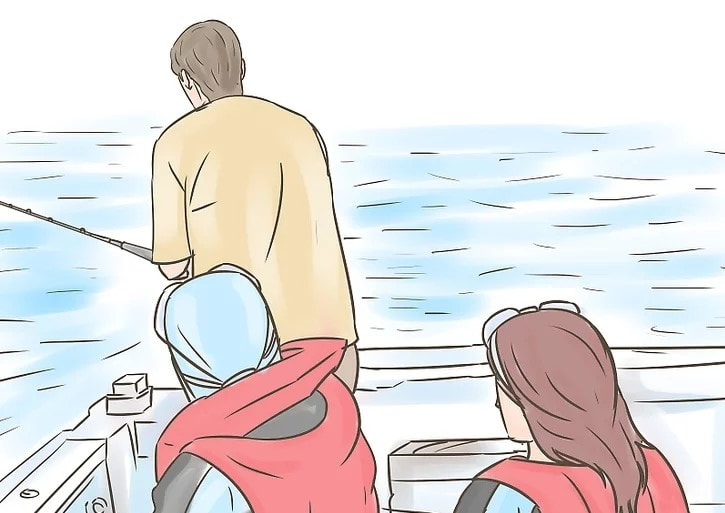
6. Practice safety first. Deep-sea fishing can pose many dangers, and safety should be the first concern any time you're out on the water, whether you're an experienced fisherman or a novice. Always listen to the captain in charge and follow instructions closely. You need to have life jackets and other required safety equipment. Check the safety requirements with the local coast guard. The exact safety equipment and amount will depend on your area and boat size. In general, life jackets, flashlights, boat lights and paddles are required.
  • Watch the weather patterns. If storms are in the area, it may not be safe to go out. Ensure you will be able to navigate the waters and keep your radio on at all times to listen to Coast Guard warnings. You also need to be projecting a positioning signal at all times, should your boat capsize.
  • Practice caution when handling fish. While deep-sea fishing, you may catch large, strong fish that will generally fight a lot as you reel them in. Be sure to steady yourself so you do not fall out of the boat. Always follow directions during the capture process.

Part 3 Catching Fish

Picture
1. Go where the fish are. In general, captains should have a good sense of where fish will be easy to find at the time of year and in the location you're fishing. Let the captain take the lead and direct you to a prime fishing spot.
  • Generally, drop-offs, trenches, and reefs are usually good places to fish, depending on the region. Reefs in particular are usually swimming with all variety of aquatic life, meaning that large game fish will be nearby.
  • Tuna generally can be found near schools of dolphins, or floating under debris of any kind.
2. Choose your bait. You probably won't be using nightcrawlers like when you're back at the pond. While your bait will usually depend on the variety of fish you plan to catch, live and artificial bait are commonly used in fishing for big deep sea fish. Squid, shrimp, minnows and mackerels are commonly used bait in deep sea fishing, sometimes live and sometimes as "chum," oily cut-up bait used to attract predators. Like sharks!
3. Choose a fishing method. Your method will depend on the area you're fishing and the type of the fish you hope to catch, and the captain should help to guide you in the proper technique for the day. The methods can be varied and used together, as well, to give yourself the best chance of making a big catch for the day. Listen to instructions and prepare to do any of the following types of fishing.
  • Trolling is used to drag your line deep, along the ocean floor. This is good for shallower waters to attract grouper and smaller fish, using a weighted line to skim low along the bottom.
  • Chumming is used to attract larger fish. When chumming, you'll usually leave baited lines in the water, then throw chunks of bait into the area to attract numerous fish and attempt to create a frenzy.
  • Cast a line up current. When signs suggest there will be large fish in an area cast a line slightly up current, let it come back to the area and let the fish take the bait. Reel in and recast as necessary.
  • Keep your lines as straight as possible, as the boat turns. Try your hardest not to cross lines with anyone. If they get crossed and someone gets a fish on the hook, you both will start reeling your lines and cause a tangle, which will be very difficult to get loose without losing the fish.
4. Change your bait regularly. It's a good idea to always keep fresh bait on your line, when you're deep sea fishing. If you're not getting a bite, mix it up and try something new. Listen to the captain and crew for advice, and have some patience, but also try to nix bait that's not working.
  • Don't be afraid to use your instincts, especially if you're an experienced fisherman. If you really want to try fishing with shrimp, say so and go for it. It's your fishing trip. Listen to advice, but also do what you want at the end of the day.
5. Be patient. Some deep sea fishing trips are super productive and some involve a lot of shanty singing and an empty haul. It'll still be fun, but try to temper your enthusiasm for making a big catch with a healthy dose of reality. You might be in the right place with the right gar on a beautiful day and not catch anything. Don't get frustrated and try to enjoy the experience for what it is.
6. Let the crew help you bring in your catch. Large game fish can be difficult to reel in, so it's important to listen to specific instructions and do as you're told. Assistants may help to set the lure and let you do the hard muscle work, or they may have other ways of working. Just listen closely and stay out of the way, if you can't help.
  • When keeping fish, make sure you are within your legal rights. Also be aware of conservation and not keeping any endangered fish. Put any fish you keep on ice to preserve freshness.
Tips
  • Some well-known places for deep-sea fishing are Hawaii, Gulf of Mexico, Alaska, St. Lucia and Maine.
Warnings
  • Deep-sea fishing poses more danger than lake or stream fishing. If possible, bring an experienced person with you.
6 Comments

How to Find the Best Time for Fishing

11/24/2020

0 Comments

 
Fishing at the right time is critical for a successful fishing trip. Even if you have the best fishing spot and all the right equipment, you may not catch anything if you go at a bad time. There are a number of factors to consider when deciding when to take out your rod and tackle.

Method1. Taking Time into Account

1.Consider the time of day. Fish are coldblooded, so their activity depends on the temperature of the water around them.They are inactive when it is cold, and when it is very hot they retreat to deeper waters to stay cool. Because fish eat bugs and/or little fish that eat bugs, they are most active when bugs are most active. When the air is warm and thick with mosquitos, fishing will be good.

2.Consider the season. Like all animals, fish come out in greater numbers during particular times of year. This will of course vary based on where you live and what sort of fish you hope to catch, but there are some general guidelines to keep in mind.
  • Spring – Fish bite on and off during this season. You will have better luck later in the season, and later in the day, when things get a little warmer. Fish can’t do much eating on spring mornings, because the bugs aren’t out much yet, so your best bet is to take advantage of their feeding time at dusk. At this time of year winds will push the warmer, food-filled surface water toward the shore, so try to position yourself downwind along the shoreline.
  • Summer – This is a good season for fishing if you avoid the hottest times of day. The fish will be biting well just before sunup and just after sundown, when food is abundant. Mid-day, when the sun is at its zenith, the fish will retreat to cooler, deeper water.
  • Fall – This can be an inconsistent time, but when the fishing is good, it is really good. They will likely not bite much in the morning and early afternoon. Toward the end of the day, however, the water will be warm from hours of sunlight, and the fish will be driven to eat more than usual because of the impending food shortage that winter brings. Dusk is therefore an excellent time for fishing.
  • Winter – For obvious reasons, not the best time for fishing. Unless you are ice fishing, which is a different thing entirely, you should leave your fishing rod in storage during this season.

3.Consider the tides. It is best to fish when the tide is rising or falling, as this change causes prey to move en-mass, and thus makes a great time for coastal fish to feed. Fishing will be much harder during low or high tide, when there is less water movement.
  • To find out what time high and low tides are in your area, just Google "tide chart" and the name of the town you're in.
  • If you are fishing during a high tide, look for a shallow area.
  • If you are fishing during a low tide, look for a mud bank near a slough (an area with a depression in the bottom).

Method2.Taking Weather into Account

1. Keep an eye out for warm and cold fronts. Because fish are coldblooded, they are deeply impacted by water temperature. This means their behavior can change quite a bit before and after cold or warm fronts.
  • Many fish increase their feeding in the hours before a cold front hits, and slow in its aftermath. Thus, fishing after a cold front will rarely be a successful venture.
  • Warm fronts warm the surface water, and increase the amount of feeding fish can do. The difference is most noticeable in cold weather, when fish are usually not out much, and will not be of much use if it is summer, and the temperature was already quite high to begin with.
2. Keep an eye on the wind. Wind pushes surface water toward the far shore, and small prey fish with it, luring game fish. This makes windy days a good time for fishing.
  • If you are fishing from shore on a windy day, cast into the wind. This will make your lure move in the same direction as the rest of the food, which will make it easier to attract game fish.
  • If fishing from a boat, cast toward shore in the same direction as the wind.
3. Keep an eye out for clouds. Overcast days make fish bolder. They tend to swim further from safe structures when it is a little dim out. These are good fishing days
4. Keep an eye out for rain. Rain can be your friend or your enemy, depending on how hard it is. Light rain is excellent fishing weather, especially in warm weather. It blurs the waters surface, making it harder for the fish to see you. It also washes lots of insects into the water, making it a prime time for fish to eat. Hard rain stirs up mud, and makes it harder for fish to hunt, breathe, and navigate. The fish don’t want to be out in that weather any more than you do, which is good because hard rains also create unsafe fishing conditions.

Method3.Taking Various Other Factors Into Account

1. Research the area where you're fishing to see when other people have caught fish. Check with local bait shops and fishing stores and let them know what fish you're trying to catch. they may be able to offer locations or times when other anglers are the most successful. You can also check local fishing blogs, podcasts, and magazines to see if they have recommendations.
2. Pay attention to bugs. Fish feeding activity is, of course, directly tied to insect activity. Smaller fish eat the insects, and game fish eat the smaller fish. As such, a hatch of flies or mosquitos is sure to create excellent fishing conditions. Just make sure you wear plenty of insect repellent.
3. Make the moon your friend. The moon controls the tides, which play a big role in fishing conditions. It is fairly easy to keep track of the tides by simply observing, but it can pay off to pay closer attention to the movements of the moon. Full moons, and times when the moon is close to the earth, tend to make for especially good fishing.There are lots of free online lunar calendars designed to help you find peak fishing hours.
4. Know your fish. Different types of fish prefer different water temperatures, times of day, and food. If you are fishing for a particular species, do your research. If you want to catch catfish, it won’t matter when you go out if you never venture from shallow waters.
5.Go fishing when you have the time. It’s all well and good to know when the fish will be out in force, but the truth is that most of us simply go fishing when we have the time for it. You can enjoy a lovely afternoon of fishing with some beers and a friend without ever catching a thing. Don’t get so wrapped up in finding the right time that you forget to have a good time.
0 Comments

How to Pick Freshwater Fishing Lures

11/9/2020

0 Comments

 
Freshwater fishing lures come in a number of types, sizes, shapes, and colors. Although most freshwater lures are produced for the bass fishing market, artificial lures can be used to catch other species of fish, such as crappie, perch, walleye, northern pike, and muskellunge. While some lures go through cycles of being "hot" or "new" and then are quickly forgotten, many others have enjoyed years or even decades of popularity among all anglers. Although you can fill a large tackle box with many different types of lures, understanding which lures to use in which situations will make you a more effective fisherman. Following are steps on how to pick freshwater fishing lures based on the conditions you are fishing in and the species of fish you're trying to catch.

Part 1. Matching Lure Types to Fish

1. Use plastic worms when fishing for largemouth bass. Invented in 1949 by Nick and Cosma Crème and first marketed in 1951, plastic worms are probably the best-known largemouth bass lures. Available in a host of colors and lengths from 4 to 10 inches (10 to 25 cm), plastic worms have spawned a number of other soft plastic artificial lures: grubs, crayfish, and salamanders among them. Occasionally fished on the surface, plastic worms are most commonly fished in timber, brush, weeds, and along rocky drop-offs, and they are usually rigged by threading the hook through the worm so that its body covers the hook point and makes a self-weedless rig. (This rig is called a Texas rig when fished with a bullet-shaped slip sinker and a Carolina rig when fished with a leader, swivel, and egg-shaped slip sinker.)

2. Use crankbaits in a variety of situations. Also known as plugs, crankbaits are artificial lures made of hard plastic. They are so named because they are designed to be cast out and retrieved, with some versions intended to be retrieved rapidly to trigger fish to strike them aggressively. Although some are weedless, they are usually not intended to be fished around weeds, brush, or timber. Crankbaits come in several varieties, as described below:
  • Topwater lures are designed to be fished on the surface. These include poppers, which feature a vertical concave surface that makes a popping noise when jerked with the rod tip; wobblers, which feature plates that cause the lure to move from side to side when retrieved; and stick baits, which are thin lures without any special attachments that are given their action solely by the fisherman.
  • Thin minnow lures are shaped and usually colored like minnows. They feature a small lip at the front, differentiating them from stick baits; otherwise, they may be fished on the surface or underwater, usually with a twitching motion. Normark's Rapala is the best known lure of this type.
  • Swimming crankbaits, or swim baits, are artificial lures designed to move from side to side as they are pulled through the water. One style of this type of lure is curved with a flat or concave surface at the head, which functions similarly to the lip on a thin minnow in causing the lure to swim. The Lazy Ike and Helin Flatfish are 2 examples of this type of lure.
  • Diving lures feature a larger lip than thin minnows, enabling them to dive deeper when retrieved or trolled; the larger the lip, the deeper it dives. These lures may have either long, thin bodies, or short, stocky bodies. The faster the lure is retrieved, the deeper it will dive; if the retrieve is stopped, the lure, being hollow, will usually rise to the surface, although some crankbaits will remain suspended at the depth they reached.

3. Use spinnerbaits in situations where other lures would get hung up. Sometimes called safety-pin spinners for their resemblance to an open safety pin, spinnerbaits feature a weighted end with a single hook and skirt and an end with 1 or more spinners. Spinnerbaits can be fished by being rapidly retrieved across the surface so that the blades flash and splash, bumped off standing timber, or let fall to the bottom around drop-offs and other vertical structures.
  • Spinnerbaits come equipped with either propeller- or teardrop-shaped blades. Teardrop-shaped blades are further divided into 3 types: the willow-leaf, which is narrow and pointed on both ends; the Indiana, which is a rounded-end version of the willow-leaf; and the Colorado, which is broad and rounded at 1 end and comes to a rounded point at the other.
  • Related to the spinner bait is the inline, or French, spinner, which features a tubular metal body with a willow-leaf or Indiana blade spinner ahead of it and a treble hook with a feather skirt behind it. French spinners are usually fished around rocky areas or in streams and attract trout, smallmouth bass, and walleye more than largemouth bass
4. Use jigs any time during the year. Jigs consist of a hook with a weighted head and either feature a hair or feather skirt or a plastic grub. Most jigs have round heads, but some jigs feature flat or triangular heads that either impart a swimming motion or keep the hook upright and out of rocks and weeds. Jigs are normally retrieved in an up-and-down motion and can be fished in warm or cold water situations, usually by slowing the retrieve as the water gets colder. Some jigs feature stiff brush or wire guards to keep them weedless, while most feature only a bare hook. Nonetheless, the best places to fish jigs are usually those places where they can get hung up, near weeds, brush, or rocks. (Jigs are the cheapest type of artificial lure, however, so the loss of a few jigs is usually not as consequential as the loss of a crank bait.)
  • Some jigs are rigged with removable safety-pin spinners, usually with a small grub body. The most familiar jig of this type is the Bass Buster Beetle Spin, a popular lure for a number of fish species.
  • Jigs may be fished in several ways. When fishing for bass, jigs are often flipped or pitched short distances instead of being cast long distances like most lures. They are usually retrieved with a lift-and-drop motion, slowly raising and lowering the rod so that the jig falls on a taut line. They may also be retrieved straight, with the rod kept at a 10 o'clock position to impart a swimming motion to the lure.
5. Use spoons for a number of different species. One of the oldest lures, the spoon was developed in 1850 by Julio T. Buel of New York, supposedly by cutting the handle off a teaspoon and putting a hook on it. The resemblance to the bowl of a spoon causes spoons to wobble from side to side as they are retrieved, which is what draws fish to them. Smaller spoons have been used to fish for trout and panfish, while larger spoons have been used to fish for bass, pike, walleye, and other large fish.
  • Most spoons are designed to fish below the surface; these spoons feature a treble hook attached with a split ring. Two of the best-known spoons of this type are the Eppinger Dardevle, most familiar in its red-and-white striped pattern, and the Hofschneider Red-Eye, noted for 2 plastic eye-beads and hooks at the front and back. Thicker versions of these spoons may be cast or trolled, with the thickest designed to be fished like jigs, while the thinnest versions are designed exclusively for trolling.
  • Another type of spoon features a single wire-weedless hook whose shank is attached to the back of the spoon. This type of spoon is designed to be rapidly retrieved across the surface and is often dressed with a strip of pork rind or other bait attached to the hook.
6. Use flies when fishing for trout. Flies consist of a single hook with either a hair or feather skirt. They are the smallest and lightest fishing lure and are usually used when stream fishing for trout, using special rods that cast weighted line with the fly attached with a monofilament leader. Flies are available in a number of patterns to match fly species trout feed on; many anglers tie their own flies, sometimes even at stream side to "match the hatch." Flies are available in 5 types, described below:
  • Dry flies float on the surface and are usually dressed with a waterproofing compound to keep them from waterlogging and sinking. They are attached to a floating line and fished in a way that matches the natural surface motion of the insect they are imitating.
  • Wet flies are designed to sink and to simulate swimming or drowning insects, as well as insects either laying eggs or hatching from them. They can be fished with floating, sinking, or sinking-tip lines, according to how deep you want to fish the fly. In calm water, you cast a wet fly beyond the fish's position and let it sink to the proper depth before retrieving it in as natural a fashion as you can. In moving water, you cast closer to and upstream from the fish and let the water move the fly to the fish.
  • Nymphs are a form of wet fly that simulates young insects or other small aquatic life. They are generally fished the same way as other wet flies.
  • Streamers may be fished the same way as either a dry or a wet fly. They are intended to simulate minnows or other small fish.
  • Bugs are dry flies designed to suggest large insects, amphibians, mice, or injured minnows. Some are designed with popper heads, like the topwater plug previously mentioned. They can be fished with either a floating or sinking-tip line.
  • Some fly fishermen fish multiple flies to determine which type of fly the fish are biting. It is possible to combine several fly types when doing this; however, you'll need to consult the fishing regulations for your state to determine how many hooks (lures) you can have attached to your line at once.

Use spinnerbaits in situations where other lures would get hung up. Sometimes called safety-pin spinners for their resemblance to an open safety pin, spinnerbaits feature a weighted end with a single hook and skirt and an end with 1 or more spinners. Spinnerbaits can be fished by being rapidly retrieved across the surface so that the blades flash and splash, bumped off standing timber, or let fall to the bottom around drop-offs and other vertical structures.
  • Spinnerbaits come equipped with either propeller- or teardrop-shaped blades. Teardrop-shaped blades are further divided into 3 types: the willow-leaf, which is narrow and pointed on both ends; the Indiana, which is a rounded-end version of the willow-leaf; and the Colorado, which is broad and rounded at 1 end and comes to a rounded point at the other.
  • Related to the spinner bait is the inline, or French, spinner, which features a tubular metal body with a willow-leaf or Indiana blade spinner ahead of it and a treble hook with a feather skirt behind it. French spinners are usually fished around rocky areas or in streams and attract trout, smallmouth bass, and walleye more than largemouth bass

Part 2. Choosing the Right Lure

1. Choose lure colors according to weather and water conditions. The general rule for lure color is "bright day, light colors; dark day, dark colors." On bright, sunny days and in clear water conditions, choose lures that are light in color and mimic natural patterns. On cloudy days and in dirty water conditions, choose darker lures and those with a non-natural coloration, preferably types that make noise or vibrate as they move through the water.
  • A notable exception to this rule is the use of 2-toned plastic worms that feature a darker head color and a fluorescent pink or yellow tail color. Many anglers use plastic worms colored like this when fishing in cloudy water conditions
2. Choose lure size according to the tackle you're using and the species you're fishing for. In general, choose smaller jigs and grubs when fishing for panfish (bluegill, sunfish, crappie, perch) and larger lures such as spinnerbaits and crankbaits when fishing for bigger fish (bass, walleye, and pike). Smaller lures are best suited for light and ultralight spinning and spincasting tackle (or fly rods in the case of dry and wet flies) with lines of 4 to 10-pound test (2 to 5 kg class), while larger lures are meant to be fished with medium to heavy action rods, spinning or baitcasting reels, and lines of 12 to 20-pound test (6 to 10 kg class) or better. (Lures used to fish for muskellunge, the largest member of the pike family, are decidedly larger than those used for bass, walleye, and northern pike, and often require the use of a wire leader because of the muskie's sharp teeth.)
  • Lure size can also be dictated by weather conditions and how fish react to them. In early spring, or when cold front conditions clear the skies and cool the water to make fish lethargic, smaller lures are usually better choices than larger lures. (Lures used for ice fishing are exceptionally tiny, usually grub jigs or small spoons.) In high-wind conditions, you may need to use a larger lure simply to have enough resistance on the end of the line to keep the wind from bowing it so that you can't detect if fish are hitting the lure. Also try casting out a spinner and just keep casting and retrieving the lure.
Tips

  • If you fish with a number of artificial lures, it helps to have more than 1 rod rigged up, so that you can switch between lures. You can also tie a snap or snap swivel to the end of your line to make it easier to change lures, although this is best suited for fishing with crankbaits, spinnerbaits, and spoons. Most fishermen prefer to tie jigs and self-weedless rigged plastic worms directly to their lines, and fly fishermen normally tie their flies directly to their leaders.
  • For fishing lures that run below the surface, such as crankbaits, spoons, and jigs, the lighter test or class the line you use, the deeper your lure will dive because lighter lines are thinner than heavier lines. Keep in mind water conditions and the cover you're fishing in, however; you'll want a heavier line around weeds, timber, or rocks. If you use spinning or spincasting tackle, you can carry several reel spools filled with different weights of line and switch between them to adjust to conditions.

Warnings

  • There is no one artificial lure or presentation that will work in all conditions for a particular species, nor is there a lure that will be equally attractive to all fish species at all times. Try several fishing methods and then concentrate on those methods that you are most comfortable with and choose those lures that you have the most confidence in.
  • If you fish with both plastic worms and crankbaits, keep the plastic worms separate from the plugs, as the soft plastic will react with the hard plastic used to make crankbaits. You can either keep them in separate trays or use a special plastic case or resealable bags to keep the worms in.

0 Comments

Fishing Rod Maintenance and Safety – Top Ten Tips

2/18/2020

1 Comment

 
  • Do not exceed the recommend line rating or drag rating for your rod.
  • Never ‘High Stick’ your rod – Over bending your rod when fighting or landing a fish is commonly referred to high sticking. Always maintain a maximum load angle of 45 – 60 degrees when fighting a fish and these parameters should never be exceeded.
  • If your lure or rig becomes snagged always keep the rod pointed towards the snag and walk backwards keeping tension on the line. More than likely you will lose your tackle, but you cannot break your rod with this procedure.
  • Like a diamond, carbon fibre rods are incredibly strong but can be brittle – Be careful not to drop or hit them on hard surfaces. It may also seem a bit obvious, but many expensive rods have been damaged by ceiling fans and car doors.
  • Fishing rods are designed to evenly distribute the stress over the entire rod blank – Never place your hand high above the reel seat to assist the rod, as this will increase stress and cause the rod to break. Always maintain a maximum load angle of 45 – 60 degrees and never high stick it.
  • Graphite carbon rods are excellent conductors of electricity – Never use a carbon fibre fishing rod during an electrical storm or near power lines.
  • After using your fishing rod in a saltwater environment, always wash your rod well with fresh clean water as soon as you can and pay attention to the guide rings and reel seat. You can use apply light reel grease on the guide metal – but use it sparingly.
  • Use caution when transporting your rod and always disassemble it and place the rod in the rod case during transport.
  • Use caution when winding your line in and never pull the swivel through the guide tip as this will damage the guide ring.
  • Check all guide rings for hair line cracks or chips – replace immediately if damaged
 

1 Comment
<<Previous

    Author

    Global Fishing Tackle

    Categories

    All
    Fishing Knowledge
    Fishing Skills
    Fishing Tackle

    Archives

    April 2025
    October 2024
    October 2023
    March 2023
    October 2022
    May 2022
    August 2021
    November 2020
    February 2020
    June 2019
    April 2018
    January 2018
    April 2017
    November 2016
    October 2016
    June 2016
    May 2016
    February 2016
    January 2016
    November 2015
    October 2015
    May 2015
    April 2015
    December 2014
    October 2014
    September 2014
    August 2014
    July 2014
    June 2014
    May 2014
    April 2014
    March 2014

    Articles list
    The Fishing Rod: Parts & Terms

    The Fishing Reel: Types of Fishing Reels

    Fishing With Live Bait

    Fishing With Prepared Baits

    Types of Fishing Lures

    Fish Anatomy

    Understanding Fish Senses

    Which Rod and Reel Should I Buy? – Your First Rod & Reel

    Two Knots You Absolutely Need to Know  

    How to Assemble a Spinning Reel and Rod

    How to Load Line on a Spinning Reel

    How to Set the Drag on a Spinning Reel

    How to Cast Your Spinning Rod

    How to Find Fish


    How to Play and Land a Fish

    How to Keep and Clean Your Fish

    How to Fish a Small Creek

    How to Fish for Flounder

    How to Make a Topwater Lure for Saltwater Fishing

    How to Take Children Fishing

    How to Be a Good Fisherman

    How to Become a Professional Fisherman

    How to Become a Fishing Guide

    How to Begin Ice Fishing (USA)

    How to Cast Baitcasting Tackle

    How to Cast a Bait Caster or Spinning Rod

    How to Cast a Fly Fishing Rod

    How to Cast Spinning Tackle

    How to Catch Bass on Topwater Lures

    How to Catch a Carp

    How to Catch a Muskie

    How to Catch Fish in a Lake

    How to Catch a Catfish

    How to Catch a Snipe

    How to Catch Blackfish

    How to Catch Bullhead Catfish

    How to Catch Freshwater Fish

    How to Catch Sunfish

    How to Catch Large Mouth Bass

    How to Fight a Fish

    How to Catch Striped Bass

    How to Select a Fishing Rod

    How to Fish for Bass

    How to Choose Fishing Line

    How to Fix a Broken Fishing Rod

    How to Cast With a Surf Rod on a Beach

    How to Equip for Ice Fishing
    ​

    Purchase fishing tackle from us, help you earn more money

    How to Learn Fly Fishing
    ​

    How to Catch White Sea Bass

    How to Fish (for Beginners)

    How to Find the Best Time for Fishing

    ​How to Catch Bass, Trout, and Panfish After Dark

    ​
    How to Use Color When Fly Fishing

    Share some photos at ETTEX 2016
    ​
    How to Choose a Fishing Rod
    ​

    How to Net a Fish

    How to Maintain a Fishing Rod
    ​
    ​
    Choosing a fly rod is not difficult. Simply follow a few simple tips

    ​
    How to Rig an Ice Fishing Rod

    ​
    Fishing Rod Maintenance and Safety – Top Ten Tips

    ​
    How to Pick Freshwater Fishing Lures

    ​
    How to Find the Best Time for Fishing

    How to Deep Sea Fish

    How to Put a Weight on a Fishing Line

    ​
    How to Ice Fish
    ​
    ​
    How to fly fish

    ​

    RSS Feed

Picture
About Us   Products   Cooperation   Blog   Jobs   Contact Us   Privacy Policy 
© Global Fishing Tackle Inc. All rights reserved.